Showing posts with label Baking. Show all posts

Tuesday, 12 May 2020

Feijoa and White Chocolate Cake


As I mentioned on my last post. It's crazy feijoa season here. There's about 2 months of the year that NZ has an overflow of feijoa, and then we don't see them again till the next year. Which is good, because when they are in season, there are so many, and they are so good, that without fail you completely gorge yourself on them, and by the end of the season, are so over them that you're searching for new and interesting ways to use them up. 

Note: they also freeze really well, so you can scoop the pulp and stow it away in the freezer for a baking on a rainy day if you've already had your fill for now. 

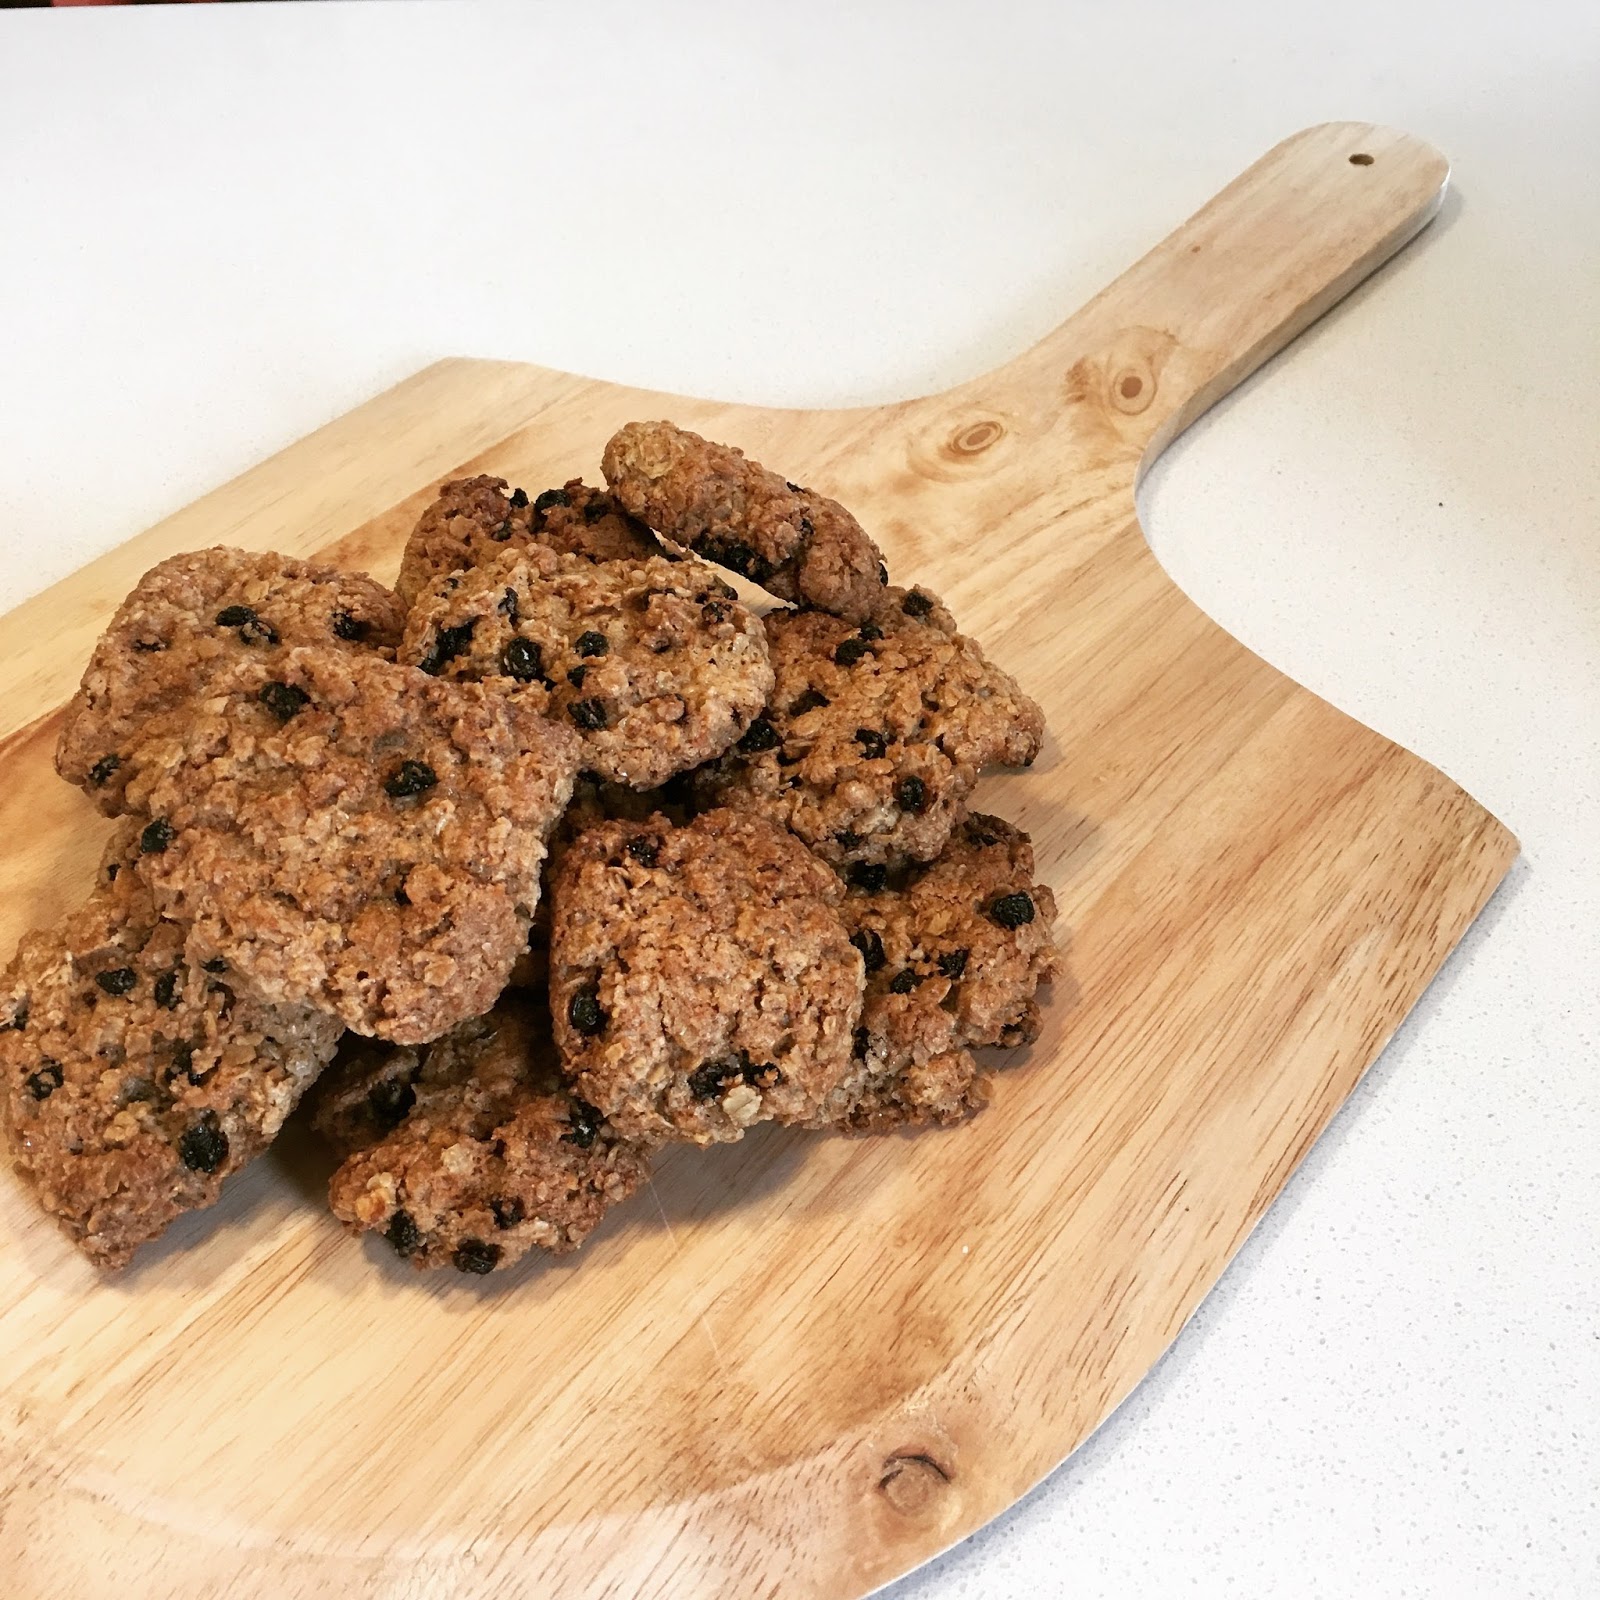
After the feijoa oatcakes and crumbles I've been making of late I wanted to try something new, plus Mr 3 wanted to make a 'Mudders Day' chocolate cake for me... FYI - by him helping bake, he means he wants to lick the spoon and eat all the ingredients, minimal help actually attained. But, he's there and involved and we have fun making a mess, so that's all good. But, yes, I made my own Mother's Day cake essentially. 

Now, he wanted chocolate cake, but me being me, and hating seeing food go to waste, I knew I needed to include the feijoa. There's a few feijoa cakes out there with cocoa in them,  but the idea of milk or dark chocolate with feijoa just doesn't quite sound right to me. Plus I wanted to make something that could have cream cheese icing, no explanation necessary on that one, cream cheese icing is THE BEST. 

A few years back I made feijoa and white chocolate muffins, which were an amazing flavour combo, so I wanted to recreate that in cake form here. The result here is a deliciously moist, rich yet tart cake. The richness comes from the white chocolate which caramelised in some spots, and the tartness from the feijoa and cream cheese icing. I've left the icing quite soft, as that's how I like it, but if you prefer a firmer icing, simply add more icing sugar. 

Ingredients (makes 24cm round cake): 

  • 1 cup sugar
  • 2 eggs
  • 2 tbsp lemon juice 
  • 1 3/4 flour
  • 2 tsp baking powder 
  • 120 grams butter, melted
  • 1 tsp baking soda
  • 3 tbsp boiling water (45ml)
  •  1 cup of feijoa pulp
  • 1/2 cup white chocolate chips, optional, but worthwhile


Icing:
  • 100g butter, room temperature
  • 100g cream cheese, room temperature
  • 1 1/2 - 2 cups icing sugar
  • 1 tsp lemon juice and lemon zest
Method:

Grease a 25cm diameter cake tin. Preheat oven to 175 degrees C. 

In a cake mixer, or using an electric hand beater beat sugar and eggs till light and fluffy. 

Add lemon juice, mix. Then add baking powder and flour, half a cup at a time, till all combined. 

Mix baking soda with boiling water, and along with feijoa pulp and melted butter, add to your cake mix, folding together till well combined. Finally fold in the chocolate chips. 

Pour cake mix into your greased cake tin and bake 40 - 50 minutes until a skewer comes out clean. 

Leave to cool in tin for 15 mins before removing to a wire rack to cool completely. 

Once cooled ice with cream cheese icing. 

To make icing, beat butter until light in colour and fluffy. Add softened cream cheese and beat until smooth and combined. Add sifted icing sugar half a cup at a time until it reaches the desired consistency. I like it quite soft. Stir in a teaspoon of lemon juice and lemon rind (optional). 


Saturday, 2 May 2020

Feijoa Oatcake

Wow. Welcome back. This is my first blogpost in 8 months! But more importantly, how have we been in lockdown for six weeks and I have only just decided to reboot the blog? I mean, we've been baking up a storm, cookies, cakes, bread, slow cooks, stir frys, curries. Heck we even recreated the famous Big Mac one night, which by the way was SO GOOD! (Find the recipe we used here).  So why haven't I shared on here yet? Well, I'm a mum. A 3 year old, and a 21 month old. Who for the past six weeks have been stuck at home, like every other kid in the country, with no kindergarten reprieve for me. Don't get me wrong, it's been great. The two of them have begun to play together more, (and fight just as much), we've done walks, crafts, and baking. Plus we made a panic buy, (no not toilet paper) the day the impending lockdown was announced: a trampoline. A great outlet for all! 

So yeah, two little ones keep me pretty busy. Plus most of what I have been making this past 6 weeks is other peoples recipes. My creative outlet was on autopilot. But this morning, feeling slightly under the weather (thanks delicious bottle of red wine last night) I was in the mood to be a bit more experimental and it sure paid off. The smell wafting through the house when I pulled this out of the oven was incredible. We ate it warm, without cream or yogurt, but having a dollop on the side would only add to the experience. The rest eaten cold, was soft aand chewy and extremely moreish.  It will keep in an airtight container for a day or two, 3 or 4 days in the fridge, but it's pretty low in sugar and lots of moist fruit so is best eaten within the first couple of days. 

This is a twist on a traditional shortcake recipe, which I've made 'healthier' if you will. Slightly less sugar, added oats, and spice, plus a switched to wholemeal flour. 
I've used feijoa, like most people who have trees, you end up overrun and out of ideas on how to use them! Once scooped, they freeze well and can be added to muffins, crumbles or used in this delicious Oatcake. 

If you don't have feijoas, any fruit would do. Fresh or tinned peaches or plums; Berries - fresh or frozen; Stewed apple or pear. Also, any flour would work. I used wholemeal just to up the fibre content, and make me feel better about serving the kids adult sized pieces. I mean, they'd have eaten the whole tray had I let them. But plain flour would work just as well. 

As for the spices, mix and switch to suit the fruit. Feijoa and ginger work together perfectly, but I'd put cinnamon with apple. Perhaps a pinch of nutmeg and clove with the cinnamon for a plum one - mixed spice, a touch of cardamom with peach. Suit yourself.


Ingredients (9 - 12 generous servings):

  • 3/4 cup sugar
  • 170g butter
  • 1 egg
  • 1 tsp vanilla essence 
  • 1/2 cup oats 
  • 3/4 cup wholemeal flour
  • 1 1/2 tsp ginger - optional
  • 1 tsp baking powder
  • 1 1/2 to 2 cups of fruit - as described above 


Method:

Line a 20cm square baking dish with baking powder. Preheat oven to 180*C.
Cream butter and sugar together till light in colour. Add vanilla and egg, beat well. 
Mix in oats, flour, ginger (or other spices) and baking powder, until you have a soft dough. 
Take 3/4 of the dough and press it into the lined baking dish. 
Arrange fruit over the top. 
Dollop lumps of remaining dough over the fruit. It will spread as it bakes. 
Bake for 40 mins till golden brown and the fruit is bubbling through the cracks in the top. 
Allow to cool for 15 mins before cutting and serving. 
Serve with lightly whipped cream or Greek yogurt. 
Store leftovers in an airtight container in the fridge for up to 3 days - if it lasts that long. 


Wednesday, 5 July 2017

Louise Cake

I'm amazed at how many people have never heard of Louise Cake... if you have, you're clearly one of the lucky ones. Buttery moist cake like base (it's almost a pastry to be honest!), baked, then smothered in jam (traditionally raspberry), then topped with a coconut meringue, before being baked again. 

I recently purchased a slice of Louise Cake to take away from a cafe, and to my horror when I arrived home and sat down (with my cup of tea) to eat it, I realised they had given me the wrong one. Instead I had a caramel meringue slice - yuk. Okay, it was still pretty tasty, but I'm not the biggest caramel fan so it was a bit overwhelming for me. Needless to say, my Louise Cake crave was not fixed. 

You can find a classic Louise cake recipe in your Edmonds recipe book, it's one I've made dozens of times, but find you need about three pieces to feel satisfied. It's true with many of those old school recipes, the portions and ratios of base to topping were much smaller. So my version has a thicker more decadent base, and today I've chosen to smother it in homemade feijoa jam, but you could use any of your favourite jams, preserves, or even a lemon curd. The coconut topping is also thick, and I've tried not to add too much sugar. I find with the base and jam, the meringue doesn't need to be overly sweet, however it does require enough sugar to give it that wonderful thick glossy texture. 

Tips: 
Room temperature eggs are best for baking with. 
To separate eggs I just crack them in the middle and pour the egg yolk between the two halves over a bowl until the white drops out and the yolk is remaining in the shell. If you're not confident to do this then you can use a fancy egg separator contraption. 
The key is that you don't want any yolk in with the whites, but a bit of egg white with the yolks is A-Okay.    

Ingredients (makes 20-25 pieces):

Base

  • 180 grams butter
  • 1 cup sugar 
  • 1 tsp coconut essence (use vanilla if you don't have coconut essence) 
  • 3 egg yolks 
  • 2 1/4 cups self raising flour 
Topping
  • 1 cup of jam 
  • 3 egg whites 
  • 1/2 cup sugar - caster sugar is best
  • 1 1/2 cups of desiccated or thread coconut 

Preheat your oven to 170 degrees Celsius, and line a 20 x 25cm baking tray with baking paper (allow the baking paper to come up higher than the tin if possible. 

Beat the butter and sugar in a large bowl until creamed. If you have a freestanding cake mixer it makes this job really really easy. Once creamed add your egg yolks and coconut essence, mix till well combined.
 
Now add the flour and stir, or mix well until you have a crumbly dough. Press the dough evenly into your lined pan. Bake for 18-20 minutes till risen and lightly golden on top. Remove from the oven and allow to cool for ten minutes before adding the toppings. Increase the oven temperature to 180 degrees Celsius. 

While the base bakes, prepare the topping. If you are using the same bowl on your mixer, make sure that the bowl is thoroughly cleaned. You don't want any of the butter residue in the bowl otherwise the whites will not whip properly. Beat the egg whites on high using a freestanding or hand electric mixer. 

Once thickened, gradually add the sugar. I add a few spoonfuls at a time while continuing beating. You eventually want the mixture to be thick white and glossy, like meringue. You may want to rub a little of the mix between your fingers to check that the sugar has dissolved. If it still feels quite grainy, beat for another couple of minutes. Finally fold in the coconut. 

On the slightly cooled base, spread your jam evenly, getting right to the edges. (Note: If your base has shrunk down during cooling, that's fine - remember it's a cross between a cake and a pastry). Use a spatula to dollop and spread the coconut meringue mixture evenly across the top of the jam. 

Once spread, I rough up the top a bit so that it's not too smooth. Pop back into the oven for 20-25 minutes until lightly golden on top. Allow to cool for 5-10 minutes before using a sharp knife to slice the still warm slice into 20-25 pieces. Then leave to cool completely before removing from the tin. 

This is ideal served with mugs of hot tea. Enjoy x


Saturday, 29 April 2017

Toasted Muesli

As the mornings get colder (and often wetter) firing up the oven and making your own muesli is the perfect way to toil away a wet weekend morning. This version is refined sugar free and is loaded with delicious clusters of crunchy oats as well as being loaded with nuts and seeds. 
Feel free to adapt it as you like. Here I've used a mixture of quick cooking oats (for the clusters) and larger wholegrain oats, but if you want a richer clusterful muesli, omit the larger oats at the end. 
Also feel free to adapt the combinations of nuts and seeds which are added. I love walnuts, so went with that this time, but cashews, macadamia, almond or pecan would also be delicious and no doubt I'll be mixing it up with my next batch. If you're a dried fruit fan, you can add that at the end once it has finished cooking. 

Ingredients (makes 10 cups of muesli; 20-30 serves):  

  • 3/4 cup dried pitted dates
  • 2 tsp vanilla essence 
  • 1 tbsp cinnamon 
  • 3/4 cup water
  • 1/4 cup olive oil
  • 1/4 cup water extra
  • 3 cups of quick cooking oats
  • 1 cup coconut
  • 3 cups of traditional wholegrain oats - I used Harraways 
  • 1 cup nuts - walnuts, almond, cashew, macadamia, pecan or a mixture
  • 1 cup pumpkin seeds
  • 1 cup sunflower seeds
  • 1 cup chopped dried fruit of your choice - sultanas, apricot, cranberries etc (optional) 
Put dates, vanilla, cinnamon, and 3/4 cup of water into a small saucepan. Simmer on a low heat for 5 minutes stirring frequently. We want the dates to begin to dissolve in the water, and the water to reduce so the result is a date paste. 

Preheat oven to 150 degrees Celsius, and place 3 cups of quick cook oats and coconut into a large roasting dish. 

Add 1/4 cup of oil, and another 1/4 cup of water to the date mixture. Mix well to combine, then stir through the oats. It should be a sticky mess at this stage. Excellent. 
Spread evenly across the roasting dish and break up any large clusters. 

Roast for 40 minutes, turning every 10 minutes. You want the oats to dry out. 

Now add the remaining wholegrain oats, nuts and seeds. Continue cooking for another 10 - 20 minutes turning once. 

Remove from the oven and allow to cool completely. If using dried fruit add it once cooled. Finally, store your muesli in an airtight container for up to a month. 

Serve with your choice of fruits, yogurt and milk.    


Tuesday, 18 April 2017

Garlic and Herb Focaccia

There's something very gratifying about baking your own bread. Firstly, there's the unmistakable aroma which fills the house, but also that slightly smug feeling of having baked your own bread and showing off about it. Focaccia is relatively easy as there's only one knead required when the flour is all added to the mix, then leave to rise, punch down, shape and rise again before baking.  

Most people think making your own bread (without a bread maker) is in the too hard basket, but it's really not. It just takes a bit of time and patience, not to mention a bit of elbow grease in that kneading process. 

However I'll share a couple sneaky shortcuts with you. In the kneading part, it can be made really effortless if you have a mixer with a dough hook (it's that weird squiggly looking thing that you thought you'd never find a use for). If you don't have a mixer with a dough hook, you'll have to do it the old fashioned way. I'm sure you an find dozens of YouTube tutorials on kneading bread, but the basic technique is to use one hand to fold the dough, the other to turn, and repeat for a few minutes till the dough feels smooth and elastic. 

The other shortcut tip I use is to warm the oven to about 40 degrees Celsius and use this as the place to rest the bread while it rises. A hot water cupboard is also a good place to pop it. Basically it just means that your bread has a sure-fired warm place to rise, draught free and stable. I find that using the oven also reduces the rising time a little. Mine only needed about 45-50 minutes, whereas sometimes (especially as the nights get cooler) it can take double that. 

Ingredients (Makes an 18 x 24cm tin sized loaf)

  • 1/2 cup good quality olive oil
  • 2 tbsp of dried or fresh herbs (thyme, rosemary, oregano, basil or Italian mixed herbs) 
  • 2 cloves garlic, crushed
  • 2 1/2 tsp active yeast (I use Edmond's Sure to Rise) 
  • 1/2 tsp honey or sugar
  • 2 1/2 cups plain flour 
  • 1 tsp salt 
Firstly heat the oil in a small pan with the herbs and garlic and cook on low for a few minutes till aromatic. Do not let the garlic brown or burn. Set aside to cool. 

In a large bowl (or the mixer bowl for the dough hook) mix 1 cup of warm water with the active yeast and honey. Set aside somewhere warm for 5 minutes to let the yeast activate.

Add half of the oil mixture and one cup of the flour to the yeast mixture and mix briefly so that the flour is moistened. Set aside for another 5 -10 minutes. 

Preheat your oven to 40 degrees Celsius and oil your baking dish, a rectangular slice tin is best, a few cm high on the edges. 

Now add the rest of the flour and salt, use your hands (or the dough hook attachment of your mixer) to mix the flour in and knead on a floured bench for a few minutes till smooth and elastic.

Pop the dough into the oiled tin, loosely cover with a tea towel, and pop into the warm oven for 40 - 60 minutes. Check frequently from 40 minutes, you want it to be at least doubled in size.

Once well risen, remove it from the oven and increase the temperature to 220 degrees Celsius. Knock the dough around a bit and press it down to fill the tin, using your fingers to make dimples on the top, then pour the remaining herbed oil over the top. Set aside for another 20 -30 minutes to allow it to puff up again. 

Pop the risen, piled dough into the hot oven for 15-20 minutes. Remove from the oven when golden and sounds hollow when tapped. Remove to a wooden board or cooling rack and leave for 5-10 minutes before cutting and serving. 

This bread is delicious with soup, olive oil and dukkah, lathered in butter, or sliced lengthways and filled like a sandwich.  


Sunday, 16 April 2017

B & E Mini Pies


Everybody loves bacon and egg pies amiright? Well they sure are a winner in our house. These mini pies were created because I had some extra pastry and bacon that needed a home (like bacon every needs a home, but anyway). Best of all, they only take minutes to whip up, 25 minutes to bake, and seconds to devour. Pop them in lunchboxes, perfect for a picnic, take a plate or morning tea.
Be careful though, they're one of those things that you blink and they're gone. Seriously, I was eating one, (as I typed this recipe) and then it was gone, may have accused the Mr of taking my last bite, but alas, it was me. Whoops.

Ingredients (makes 6 texas muffin sized mini pies - recipe easily doubled)

  • approx 150 g puff pastry 
  • 3 rashers of free range middle bacon
  • 3/4 cup frozen peas
  • 3 free range eggs
  • 3 tbsp milk 
  • salt and pepper 
  • butter to grease

Grease 6 texas muffin sized muffin holes and preheat your oven to 190 fan-bake.

On a lightly floured surface, roll pastry to make 6 x 15 cm squares. Gently press a square of pastry into each muffin hole, letting it overlap in spots, and leaving excess pastry to hang. 

Roughly chop bacon and divide between the pastry cases. 

Rinse frozen peas with water and drain, divide amongst pastry cases. 

Lightly beat the eggs with the milk and season with salt and pepper. Pour the egg mixture into the pastry cases. 

Use a pastry brush to brush a little of the egg mixture over the pastry which overhangs (this step isn't necessary, but will make the pastry golden when it bakes). 

Pop into a hot oven for 25 minutes till puffed and golden. 

Leave to cool for 10 minutes before removing. Eat warm or cold with or without a dollop of your favourite chutney.   


Monday, 20 March 2017

Fig Almond and Honey Tart


Figs are in season and if you're lucky enough to have a tree (or a friend/neighbour), you can save yourself big bucks because they cost a small fortune from the fruit and vegetable shop. Luckily I got sent a box full from my mother in law's tree and they were the perfect level of ripeness. 

The tart recipe itself is an adaptation of the Rhubarb and Frangipane tart I posted a few years ago. 

Ingredients (serves 8-10): 
  • 200g plain flour
  • 1/4 tsp salt
  • 100g butter, cold and cubed 
  • 1 egg yolk
  • 2 tablespoons of iced water
  • 8 - 10 fresh figs
  • 125g butter, room temp.
  • 100g caster sugar
  • 4 heaped tablespoons of honey 
  • 2 eggs
  • 1 1/2 cups ground almonds
  • 45g plain flour 
  • 2 tbsp honey, for drizzling
  • lightly whipped cream or thick yogurt to serve
  • optional: extra honey roasted figs to serve

In a bowl place cubed butter, flour and salt. Rub together using fingers until it resembles breadcrumbs. To speed up the process you can do this in a food processor, which makes it very quick and easy, but less therapeutic. Once rubbed in, add the beaten egg yolk and chilled water, mix to form a firm dough. Cover loosely in glad wrap and chill 30 mins.

Make a cup of tea and relax for a bit.
Grease a 22cm tart tin and preheat oven to 180 degrees.


Remove pastry from the fridge and roll out on a lightly floured surface. Press gently into the greased tin and trim edges.

To make the filling, cream the 125g of room temperature butter and caster sugar till light and fluffy. Add the eggs one at a time, then honey, flour and almonds. Mix well. Spoon this filling into the pastry.

Prepare the figs by trimming off the stalk end and any really soft parts from the bottom. Slice in half, and arrange the figs cut side up on the almond filling, gently pressing into the filling.
Warm a couple of tablespoons of honey and drizzle or brush this over the top of the tart, making sure to cover the figs.

Bake at 180 degrees Celsius for 50 mins.
Eat warm or at room temperature served with lightly whipped cream* (or yogurt) and more grilled figs**. 


*When whipping the cream, add another spoon of honey to sweeten 
** To grill the figs prepare as above, washing, trimming the top, and slicing in half. Arrange in a roasting dish cut side up and brush with some warmed honey. Turn the grill in your oven on high and place the roasting dish just underneath the grill. Grill for 5-10 minutes checking often, remove from the oven when they start to get golden. Serve warm with the tart and cream. 

Friday, 10 March 2017

Yoyos - Just like Nana used to make.

Okay, so I didn't create this recipe. It's from the classic Edmonds Cookbook that you'll find in most NZ households. It is however one that I've been enjoying for as long as I can remember. I have the best memories of sitting on the kitchen bench at my Nana's house, helping to roll the dough into little balls and pressing them down with the back of a fork. Then once they were cooled helping to ice them. You can often find a similar variation of these biscuits in cafe's called melting moments. 

Basically they're a delicate shortbread filled with butter icing. Yoyo's however have the addition of custard powder which gives them a really tasty creamy twist. My Nana used to add a tiny bit of lemon to the icing, and in this variation I've added passionfruit, you could easily swap the passionfruit for 2 tbsp of lemon juice instead, depending on the season.

See below for the recipe.... as these are the perfect rainy day baking treat. 


Post shared by Stef Parker (@sparkmypantry) on


YOYOS

Ingredients (makes 15-20 biscuits - 30-40 balls):
  • 175g butter, softened
  • ¼ cup icing sugar
  • ¼ tsp vanilla essence
  • 1½ cups Edmonds standard flour
  • ¼ cup Edmonds custard powder
Butter filling:
  • 50g butter, softened
  • Pulp from 1 passionfruit (or 2 tbsp lemon juice) 
  • 2 Tbsp Edmonds custard powder
  • ½ cup icing sugar
Method:

Preheat the oven to 180ºC. Line two baking trays with baking paper.


Cream the butter, icing sugar and vanilla until light and fluffy.
Sift the flour and custard powder together and mix with the creamed butter to form a soft dough.
Roll teaspoonfuls of the mixture into balls, place on the prepared trays and press down with a fork.
Bake for 15–20 minutes until lightly golden. Leave on the trays for a few minutes before placing on a wire rack to cool completely.

To make the icing, simply beat all the filling ingredients together until light and fluffy. 

Once the biscuits are cooled sandwich them together with the butter icing. 

Enjoy - these delicate morsels won't last long! 

Sunday, 12 February 2017

Sultana Oat Cookies

COOKIES! I am all about the cookies at the moment. Maybe it's part of being a new mum and the fact that I'm constantly hungry, or needing to snack on the go, either way, give, me, the, COOKIES. 
I have to admit however, this is the first batch of cookies that I have made myself since the little one arrived, partly because I thought I didn't have time, and partly because of the convenience of store bought ones! 
Anyway, I decided I should get back in the kitchen (finally) and make my own, however if you're a fan of store bought cookies then these will remind you of the Farmbake Oat and Sultana cookies - promise. 

You'll notice I love putting oats in my cookies, it adds texture and makes them somehow seem healthier, heck we may as well just eat these ones for breakfast, they're practically muesli, right?
Plus, you won't get sent home with the note from school for putting them in your little ones lunch box - well you better not! 

I like to chill the rolled balls of dough on the tray before baking. It stops them from spreading out so much and keeps them nice and plump. 
These will keep really well in an airtight container for a week, provided they don't get eaten first. 

Ingredients (makes 20-30 cookies): 

  • 1/2 cup white sugar
  • 3/4 cup brown sugar
  • 1/2 cup + 2 tbsp canola or rice bran oil
  • 1 tbsp vanilla extract
  • 1 egg
  • 2/3 c flour
  • 1 tbsp ground cinnamon
  • 1 tsp ground ginger
  • 1/2 tsp salt
  • 1/2 tsp baking soda
  • 3 c rolled oats
  • 1 c dried sultanas - raisins or currants are equally as delicious
  • 2/3 cup desiccated coconut 
Preheat oven to 190 degrees Celsius. Line two trays with baking paper.  
In a bowl whisk sugars, oil, vanilla, and egg. In another bowl combine flour, cinnamon, ginger, salt, baking soda, sultanas and coconut. 
Mix dry and wet ingredients together till well combined. 

Use wet hands to shape balls of dough, I make mine about ping pong ball size and then lightly press them with the back of a wet spoon. I popped mine into the fridge for 15 minutes at this stage, it helps to keep them rounder, rather than flatter, but you're welcome to skip this stage. 

Bake for 15 minutes until lightly golden (if you've opted for larger cookies you may need to bake for an extra 5 minutes). Leave on the tray to cool for 10 minutes before removing to a wire rack to cool completely. Store in an airtight container for up to 1 week. 

*Unbaked cookie dough can also be wrapped and frozen for up to 3 months. Simply remove from the freezer, thaw, roll and bake when you're ready... Freezing the dough is also a good idea if you don't want to eat the whole batch of cookies at once!  


Friday, 30 September 2016

Carrot Cake with Cream Cheese Icing

Carrot cake is my favourite cake, I think it's because of the bits, the texture, the little surprise bites of walnut that you get. Most people will tell you that it's the cream cheese icing (if that's you - be sure to double the icing quantity), but for me, it's the walnuts. 
I've adapted this recipe over the years to have more carrots, and less sugar, though it still has 1 cup of brown sugar, it's considerably less than what it was before! 
It's also so fast and easy to put together, and throw into the oven. 


Ingredients (Serves 8 - 12):
  • 2 cups flour 
  • 2 tbsp baking powder
  • 2 tbsp cinnamon
  • 1 tsp ground ginger
  • 1 cup of packed brown sugar
  • 3 cups of grated carrot 
  • 3/4 cup chopped walnuts
  • 1/2 cup chopped dates 
  • 1 cup of vegetable oil 
  • 3 eggs lightly beaten 

Cream Cheese Icing** - double this icing quantity, if filling the middle of the cake also. 
  • 250 grams of cream cheese 
  • 1 cup of icing sugar
  • 1 tbsp lemon juice
  • pumpkin seeds, toasted coconut, chopped nuts or dried fruit to decorate


Preheat the oven to 180•C and prepare a 22cm round baking tin. I grease with oil, and line the base with baking paper. 

Sift the flour, baking powder, cinnamon and ginger into a large bowl. 

Stir through the grated carrot, walnuts and dates, till well combined. 

Gently beat the eggs, and add to the dry ingredients along with the cup of oil. Mix well. 

Pour the batter into the baking tin and use a spatula to make sure it is spread evenly. 

Bake for 50 minutes, or until a skewer comes out clean. Cool in tin for 10 minutes before removing to a wire rack to cool completely. 

To make the icing, beat the cream cheese to soften and sift in the icing sugar. Add the lemon juice and continue beating until smooth. Spread over the cooled cake. 

Decorate with nuts, seeds, coconut or dried fruit. If not eating all at once, store in the fridge. 

** Optional If you want to make the cake even more spectacular, double the icing recipe and cut the cake through the middle horizontally. Fill the middle of the cake with 1/3 of the icing. 

Monday, 19 September 2016

Carrot and Date Loaf

I find baking rather therapeutic, or maybe it's the eating of the baking afterwards. Either way, it's good for the soul, and in my book it's much better for you as a treat than any of the store bought packaged items available. I couldn't decide if I wanted to make a carrot cake or a date loaf. Carrot cake seemed too elaborate for the lunch boxes, and date loaf, well... not quite right. Hence I combined the two.
This is delicious as a snack, dessert or even breakfast; smeared with softened butter, or in keeping with the carrot cake theme delicious spreadable cream cheese. 


Ingredients (Makes 8-10 slices): 

  • 100 grams butter, cubed
  • 1/2 cup packed brown sugar
  • 1 cup of dates
  • 1 cup of cold water
  • 2 tsp ground ginger
  • 1 tsp ground cinnamon
  • 1 tsp baking soda
  • 1 1/2 cups plain flour
  • 1 1/2 tsp baking powder
  • 1 cup or 120 grams of chopped nuts (I've used a combination of walnuts, almonds, cashews) 
  • 1 cup of packed grated carrot
  • 2 eggs at room temperature
In a saucepan, combine butter, brown sugar, dates, water, ginger and cinnamon. Gently bring to the boil and simmer for about 5 minutes, stirring occasionally till the dates begin to break down. Remove from the heat and stir in baking soda - get the kids to watch as it fizzes up! Set aside to 20 minutes to cool down. 

Meanwhile preheat the oven to 180•C bake or 160•C fanbake. Line a loaf tin (or 12 muffin tray) with baking paper so that there is plenty of overhang. 

In another bowl combine flour, baking powder, nuts and grated carrot. 

Once cooled, quickly beat the eggs into the date mixture, then combine this with the flour mix. Mix till just combined before pouring into the loaf tin (or muffin trays). Bake for 50 minutes (25-30 minutes for muffins) or until a skewer comes out clean. 

Leave in the tray for 10 minutes before removing to a wire cooling rack. Enjoy morning, noon or night served with softened butter, or a lashing of cream cheese for that carrot cake nostalgia. 


Thursday, 4 August 2016

Creamy Green Chicken Pie

Despite the name of this pie it's relatively light, using sour cream instead of full cream. The 'green' part comes from the fact that the pie is packed with greens. 

The filling is best made the day before, or at least early enough so that it has enough time to chill before putting into the pastry. 

The pastry is an adaptation of my tart pastry, however I've added sunflower seeds as I wanted to add a little texture to it. 

Filling (serves 4-6): 

  • 2 tbsp oil
  • 500 grams chicken thighs, boneless, skinless
  • 1 cup of vegetable stock
  • 1 tbsp cornflour 
  • 1 leek, thinly sliced - white and light green parts only) 
  • 1/2 bunch of silverbeet - about 6 large leaves
  • 1 cup frozen peas
  • 1/2 cup sour cream
  • 1/4 cup milk
  • 1/4 cup basil pesto
  • 1/2 tsp salt
Heat 1 tbsp of oil a large pan and add the chicken, cook for a few minutes each side till lightly browned, but not cooked right through. Remove chicken from the pan, cover and set aside. 

Wash the silverbeet and separate the stalks and green leaves. Finely slice the silverbeet stalks and leek. Using the chicken pan, heat the remaining tablespoon of oil and saute the stalks and leek for a few minutes till softened. Meanwhile slice the leaves finely and roughly chop the reserved chicken. 

Combine the vegetable stock and cornflour. Add to the pan with silverbeet leaves, peas, sour cream, milk, pesto and salt. Stir well, reduce heat to low, cover and leave to cook for 10-15 minutes till the chicken is cooked through. If the sauce is quite runny, remove the lid for the last 5 minutes so that it reduces more. 

Once cooked, remove from the pan, cool to room temperature, then chill. 

Pastry: 

  • 1 cup flour 
  • 1/4 cup sunflower seeds - other nuts or seeds would also work. 
  • 90 grams cold butter, diced
  • 1 tsp salt
  • 4 - 6 tbsp chilled water
In a food processor, place the flour, salt and diced butter. Blitz on high till the butter is combined and it resembles breadcrumbs. Add the sunflower seeds and blitz on high again. The seeds will stay a little chunky which is good. 

Slowly add the iced water 1 tbsp at a time while the motor is running. The pastry will combine and become a soft sticky ball of dough. Wrap in cling film and chill for at least 30 minutes. 

Preheat the oven to 200 degrees celsius, or 180 degrees on fan bake and grease a pie dish. 

On a floured surface roll 2/3 of the the pastry out to line the pie dish, allow a little overhang. Roll the remaining pastry to make the lid. 

Spoon your chilled chicken filling into the pie dish and place the pastry lid on top. Wet the edges a little before pressing together with a floured fork. Prick the top of the pie before placing into the hot oven for 40 minutes. 

Once golden and heated through, remove from the oven and allow 5-10 minutes before slicing in and devouring. 

Wednesday, 27 July 2016

Savoury Cheese Veggie and Polenta Muffins

Savoury muffins are my new favourite snack, breakfast on the go, or as they were today, a quick and easy lunch alongside my favourite tinned soup 

These muffins are loaded with veggies and tasty cheese for calcium and a protein kick. You're welcome to chop and change the veggies used. Corn kernals and roasted pumkin or kumara are also very tasty. 

Polenta is also known as cornmeal and is available at most supermarkets, if you don't have it, you could substitute for 1/2 a cup of ground nuts, or 3/4 cup of extra flour.  

This recipe is easily doubled. I make a double batch, then individually wrap and freeze them. Frozen they stay fresh for up to 3 months. Simply grab one in the morning and it will be good to eat by morning tea time, or quickly warm in the microwave for 30 seconds. 

Ingredients (makes 12 regular muffins, or 6 texas* muffins): 

  • 1 cup milk
  • 1/4 cup olive oil 
  • 1 large egg
  • 1 tsp dried herbs or 1 tbsp fresh herbs (parsley, chives oregano or thyme) 
  • 1 cup plain flour
  • 1/2 cup polenta 
  • 1 tsp baking powder
  • 3/4 cup grated cheese, plus 1/4 extra for sprinkling on top
  • 1 grilled red pepper (skin removed), roughly chopped 
  • 1 cup of baby spinach leaves, roughly chopped, or 1/2 cup of frozen spinach, defrosted 
  • 1/4 cup finely diced red onion, shallots, or sliced spring onion
  • 1/2 tsp salt and freshly ground black pepper to taste
  • 1/2 tsp cayenne pepper or chilli flakes (optional) 


Pre heat oven to 200 degrees celsius. Grease muffin trays or line with paper cases. 

Mix milk, oil and egg in a bowl. 

Sieve flour and baking powder in another bowl and stir through polenta, herbs, cheese, pepper, spinach, onion and pepper.  

Make a well in the centre of the dry ingredients and fold in the wet ingredients. Be careful not to over-mix, some dry bits are fine. Sprinkle with remaining grated cheese. 

Spoon into muffin tins and bake for 20-25 minutes if making regular size, or 25-30 minutes for Texas sized muffins. 

Leave in the tin for 5 minutes before removing.
Serve warm or room temperature with lashings of butter and a dollop of chutney. Also, a smear of vegemite or marmite adds a salty nutritional boost. 

Can freeze for up to 3 months. 

* Texas muffins are the larger muffin trays and are a similar size to what you would get in a cafe, while regular are the more cupcake size. 

Saturday, 16 July 2016

White Chocolate and Boysenberry Tart

Here's another recipe to add to my growing tart collection. I find these to make the most satisfying desserts, which are also rather impressive for guests. Plus I find them a lot easier to make than cakes. 

Pastry becomes really easy to make once you've got the basics covered, and the use of a food processor here cuts back on the elbow grease required too. Once you have a good pastry recipe, like this one, it's all about the fillings. This is the part I love as I get to be really creative. Either with the latest crave, or simply using up fruit or chocolate in the fridge. 

Here I've used frozen boysenberries, but you could easily swap for raspberries, which are traditionally paired with both white chocolate and cream cheese. Personally, I like the depth of colour that you get with boysenberries, plus as a child, boysenberry jam was my favourite. Mixing the melted white chocolate with the cream cheese adds a subtle tanginess to the white chocolate, which can be overwhelmingly sweet at times. 


Ingredients (serves 8-12) 
Pastry:
  • 1 3/4 cups of plain flour
  • 1/4 cup of icing sugar 
  • 180 grams cold butter, diced
  • 1 egg yolk (reserve white for brushing) 
  • 3 tbsp chilled water
  • greaseproof paper
  • baking beads or rice 
Filling: 
  • 175 grams Whittaker's 23% White Chocolate - you can use another brand of white chocolate, but let's face it, Whittaker's is best. 
  • 175 grams cream cheese 
  • 3 tbsp icing sugar 
  • 1 tbsp lemon juice
  • 2/3 cup defrosted boysenberries, well drained
Step 1: Make Pastry
Sieve flour and icing sugar together. Put into your food processor with the diced butter and pulse for a few minutes till all of the butter is mixed in and it becomes a breadcrumb texture. 
Next add the egg yolk and chilled water. Pulse again. When it begins to come together, tip out onto a lightly floured board and lightly knead until you have a smooth dough. 
Flatten into a 15cm disc. Cover in cling film and refrigerate for at least 30 minutes. Pastry is much easier to work with when it is cold. 


Step 2: Bake Pastry 
Preheat oven to 180 degrees celcius. Grease a 30cm loose-based fluted tart tin with butter. 
Remove pastry from the fridge and roll out on a piece of greaseproof paper large enough to fit the tart tin. 
Gently lay the pastry over the tin and press into the edges. Use the rolling pin to roll across the top of the tin to trim off any excess pastry. 
Place the greaseproof paper over the pastry and fill the tin with baking beads or uncooked rice (less than a kilo of rice will fill it - reserve the rice afterwards for using again the next time you bake pastry). This holds the pastry in place and stops it both puffing up and from sinking down the sides. 
Chill again for 10 minutes. 
Place in the hot oven and bake for 15 minutes. 
Remove tart from oven and take off the baking paper and rice. Brush with reserved egg white, before returning to the oven for another 15 minutes to finish cooking through. 

Remove from the oven and leave to cool. If pastry has puffed up, then simply gently press it back down while it is still hot. 

Step 3: Prepare the filling
Make a double boiler by putting 1 or 2 cups of water into a small saucepan. Cover the top of the saucepan with a bowl so that no steam can escape (the water should not be touching the bottom of the bowl). 
Bring to the boil. Break the chocolate into the bowl and stir, till melted, then remove from the heat. Allow to cool slightly before adding the remaining ingredients. 

In another bowl, beat the cream cheese with lemon juice and icing sugar till softened and smooth. Stir in the defrosted and drained boysenberries. Finally combine the cream cheese mixture with the melted chocolate. Stir 

Carefully spoon the filling into the tart shell and spread evenly. Chill for 2 - 3 hours before serving. Garnish with extra crushed white chocolate or fresh berries if desired.