Showing posts with label dessert. Show all posts

Tuesday, 12 May 2020

Feijoa and White Chocolate Cake


As I mentioned on my last post. It's crazy feijoa season here. There's about 2 months of the year that NZ has an overflow of feijoa, and then we don't see them again till the next year. Which is good, because when they are in season, there are so many, and they are so good, that without fail you completely gorge yourself on them, and by the end of the season, are so over them that you're searching for new and interesting ways to use them up. 

Note: they also freeze really well, so you can scoop the pulp and stow it away in the freezer for a baking on a rainy day if you've already had your fill for now. 

After the feijoa oatcakes and crumbles I've been making of late I wanted to try something new, plus Mr 3 wanted to make a 'Mudders Day' chocolate cake for me... FYI - by him helping bake, he means he wants to lick the spoon and eat all the ingredients, minimal help actually attained. But, he's there and involved and we have fun making a mess, so that's all good. But, yes, I made my own Mother's Day cake essentially. 

Now, he wanted chocolate cake, but me being me, and hating seeing food go to waste, I knew I needed to include the feijoa. There's a few feijoa cakes out there with cocoa in them,  but the idea of milk or dark chocolate with feijoa just doesn't quite sound right to me. Plus I wanted to make something that could have cream cheese icing, no explanation necessary on that one, cream cheese icing is THE BEST. 

A few years back I made feijoa and white chocolate muffins, which were an amazing flavour combo, so I wanted to recreate that in cake form here. The result here is a deliciously moist, rich yet tart cake. The richness comes from the white chocolate which caramelised in some spots, and the tartness from the feijoa and cream cheese icing. I've left the icing quite soft, as that's how I like it, but if you prefer a firmer icing, simply add more icing sugar. 

Ingredients (makes 24cm round cake): 

  • 1 cup sugar
  • 2 eggs
  • 2 tbsp lemon juice 
  • 1 3/4 flour
  • 2 tsp baking powder 
  • 120 grams butter, melted
  • 1 tsp baking soda
  • 3 tbsp boiling water (45ml)
  •  1 cup of feijoa pulp
  • 1/2 cup white chocolate chips, optional, but worthwhile


Icing:
  • 100g butter, room temperature
  • 100g cream cheese, room temperature
  • 1 1/2 - 2 cups icing sugar
  • 1 tsp lemon juice and lemon zest
Method:

Grease a 25cm diameter cake tin. Preheat oven to 175 degrees C. 

In a cake mixer, or using an electric hand beater beat sugar and eggs till light and fluffy. 

Add lemon juice, mix. Then add baking powder and flour, half a cup at a time, till all combined. 

Mix baking soda with boiling water, and along with feijoa pulp and melted butter, add to your cake mix, folding together till well combined. Finally fold in the chocolate chips. 

Pour cake mix into your greased cake tin and bake 40 - 50 minutes until a skewer comes out clean. 

Leave to cool in tin for 15 mins before removing to a wire rack to cool completely. 

Once cooled ice with cream cheese icing. 

To make icing, beat butter until light in colour and fluffy. Add softened cream cheese and beat until smooth and combined. Add sifted icing sugar half a cup at a time until it reaches the desired consistency. I like it quite soft. Stir in a teaspoon of lemon juice and lemon rind (optional). 


Saturday, 2 May 2020

Feijoa Oatcake

Wow. Welcome back. This is my first blogpost in 8 months! But more importantly, how have we been in lockdown for six weeks and I have only just decided to reboot the blog? I mean, we've been baking up a storm, cookies, cakes, bread, slow cooks, stir frys, curries. Heck we even recreated the famous Big Mac one night, which by the way was SO GOOD! (Find the recipe we used here).  So why haven't I shared on here yet? Well, I'm a mum. A 3 year old, and a 21 month old. Who for the past six weeks have been stuck at home, like every other kid in the country, with no kindergarten reprieve for me. Don't get me wrong, it's been great. The two of them have begun to play together more, (and fight just as much), we've done walks, crafts, and baking. Plus we made a panic buy, (no not toilet paper) the day the impending lockdown was announced: a trampoline. A great outlet for all! 

So yeah, two little ones keep me pretty busy. Plus most of what I have been making this past 6 weeks is other peoples recipes. My creative outlet was on autopilot. But this morning, feeling slightly under the weather (thanks delicious bottle of red wine last night) I was in the mood to be a bit more experimental and it sure paid off. The smell wafting through the house when I pulled this out of the oven was incredible. We ate it warm, without cream or yogurt, but having a dollop on the side would only add to the experience. The rest eaten cold, was soft aand chewy and extremely moreish.  It will keep in an airtight container for a day or two, 3 or 4 days in the fridge, but it's pretty low in sugar and lots of moist fruit so is best eaten within the first couple of days. 

This is a twist on a traditional shortcake recipe, which I've made 'healthier' if you will. Slightly less sugar, added oats, and spice, plus a switched to wholemeal flour. 
I've used feijoa, like most people who have trees, you end up overrun and out of ideas on how to use them! Once scooped, they freeze well and can be added to muffins, crumbles or used in this delicious Oatcake. 

If you don't have feijoas, any fruit would do. Fresh or tinned peaches or plums; Berries - fresh or frozen; Stewed apple or pear. Also, any flour would work. I used wholemeal just to up the fibre content, and make me feel better about serving the kids adult sized pieces. I mean, they'd have eaten the whole tray had I let them. But plain flour would work just as well. 

As for the spices, mix and switch to suit the fruit. Feijoa and ginger work together perfectly, but I'd put cinnamon with apple. Perhaps a pinch of nutmeg and clove with the cinnamon for a plum one - mixed spice, a touch of cardamom with peach. Suit yourself.


Ingredients (9 - 12 generous servings):

  • 3/4 cup sugar
  • 170g butter
  • 1 egg
  • 1 tsp vanilla essence 
  • 1/2 cup oats 
  • 3/4 cup wholemeal flour
  • 1 1/2 tsp ginger - optional
  • 1 tsp baking powder
  • 1 1/2 to 2 cups of fruit - as described above 


Method:

Line a 20cm square baking dish with baking powder. Preheat oven to 180*C.
Cream butter and sugar together till light in colour. Add vanilla and egg, beat well. 
Mix in oats, flour, ginger (or other spices) and baking powder, until you have a soft dough. 
Take 3/4 of the dough and press it into the lined baking dish. 
Arrange fruit over the top. 
Dollop lumps of remaining dough over the fruit. It will spread as it bakes. 
Bake for 40 mins till golden brown and the fruit is bubbling through the cracks in the top. 
Allow to cool for 15 mins before cutting and serving. 
Serve with lightly whipped cream or Greek yogurt. 
Store leftovers in an airtight container in the fridge for up to 3 days - if it lasts that long. 


Monday, 20 March 2017

Fig Almond and Honey Tart


Figs are in season and if you're lucky enough to have a tree (or a friend/neighbour), you can save yourself big bucks because they cost a small fortune from the fruit and vegetable shop. Luckily I got sent a box full from my mother in law's tree and they were the perfect level of ripeness. 

The tart recipe itself is an adaptation of the Rhubarb and Frangipane tart I posted a few years ago. 

Ingredients (serves 8-10): 
  • 200g plain flour
  • 1/4 tsp salt
  • 100g butter, cold and cubed 
  • 1 egg yolk
  • 2 tablespoons of iced water
  • 8 - 10 fresh figs
  • 125g butter, room temp.
  • 100g caster sugar
  • 4 heaped tablespoons of honey 
  • 2 eggs
  • 1 1/2 cups ground almonds
  • 45g plain flour 
  • 2 tbsp honey, for drizzling
  • lightly whipped cream or thick yogurt to serve
  • optional: extra honey roasted figs to serve

In a bowl place cubed butter, flour and salt. Rub together using fingers until it resembles breadcrumbs. To speed up the process you can do this in a food processor, which makes it very quick and easy, but less therapeutic. Once rubbed in, add the beaten egg yolk and chilled water, mix to form a firm dough. Cover loosely in glad wrap and chill 30 mins.

Make a cup of tea and relax for a bit.
Grease a 22cm tart tin and preheat oven to 180 degrees.


Remove pastry from the fridge and roll out on a lightly floured surface. Press gently into the greased tin and trim edges.

To make the filling, cream the 125g of room temperature butter and caster sugar till light and fluffy. Add the eggs one at a time, then honey, flour and almonds. Mix well. Spoon this filling into the pastry.

Prepare the figs by trimming off the stalk end and any really soft parts from the bottom. Slice in half, and arrange the figs cut side up on the almond filling, gently pressing into the filling.
Warm a couple of tablespoons of honey and drizzle or brush this over the top of the tart, making sure to cover the figs.

Bake at 180 degrees Celsius for 50 mins.
Eat warm or at room temperature served with lightly whipped cream* (or yogurt) and more grilled figs**. 


*When whipping the cream, add another spoon of honey to sweeten 
** To grill the figs prepare as above, washing, trimming the top, and slicing in half. Arrange in a roasting dish cut side up and brush with some warmed honey. Turn the grill in your oven on high and place the roasting dish just underneath the grill. Grill for 5-10 minutes checking often, remove from the oven when they start to get golden. Serve warm with the tart and cream. 

Friday, 3 March 2017

Passionfruit Cheesecake

Cheesecake, you either love it or you hate it and my house has always been divided. Well everybody loves it, and me, not so much... and seeing I am the one who tends to do most of the cooking, we don't often eat cheesecake. I'm not sure why I never liked it, maybe I just had one bad one and figured they were all like that - who knows. But what I do know, is that this recipe has me converted. Now that I've found one cheesecake I like, I'm looking forward to experimenting with other cheesecake flavours... watch this space. 

Passionfruit cheesecake is the Mr's all time ultimate favourite. It tops all other cakes and desserts. With passionfruit being in season, I thought I had better make him his favourite. Because this was such novelty in our house, I figured I better make a darn good one, so I trawled the internet and found literally hundreds of passionfruit cheesecake recipes, both baked and set with gelatine, some with the passionfruit mixed through, others layered on top. So I did what I do best, and followed all of them and none of them at the same time, taking different components from each, and adding my own twist, with a hint of ground ginger in the base. 

The result: A little (or large) slice of perfection! 

Ingredients (serves 8-12, depending who's eating it, if it was just my husband, you'd only get 6 slices!) 

BASE
  • 250g packet of milk arrowroot biscuits
  • 125g butter, melted
  • 2 tbsp ground ginger
FILLING
  • 1/2 cup hot water
  • 1 tbsp gelatine powder
  • 10 passionfruit
  • 375g cream cheese, room temperature (equates to 1 & 1/2 tubs) 
  • 1 cup cream
  • 2/3 cup caster sugar
TOPPING 
  • 5 - 6 passionfruit
  • 1 tbsp sugar 
  • 3/4 - 1 tsp gelatine powder
  • 1 - 2 drops yellow food colouring
  • hot water 
Prepare a round 25cm springform tin, by lining the base with non-stick baking paper. 

Place the biscuits into a food processor and blitz on high until they are finely crushed. Add ground ginger and blitz quickly to mix. Add melted butter and mix to combine.

Pour buttered biscuit crumbs into the bottom of the tin and use the back of a spoon to press firmly and evenly across the tin. Cover and set aside in the fridge to set. 

To make the filling, place the passionfruit pulp into a sieve over a bowl and use the back of a spoon to press the juice from the pulp. Reserve the pulp and seeds.*

Use an electric mixer to beat the cream cheese and sugar until smooth, add the cream and passionfruit juice, mix well again. 

Put the hot water into a small bowl and sprinkle over the tablespoon of gelatine. mix to combine and allow to cool only slightly before pouring into and mixing with the cream cheese mixture. Pour all of this into the tin on top of the base. Spoon the reserved pulp on top and use a knife to swirl through the cheesecake mixture. Smooth over, cover and chill 

Finally prepare the passionfruit jelly for the top**. Scoop pulp from the remaining passionfruit, you should have about half a cup. Measure half a cup of hot water, stir in the sugar till dissolved, then stir in 3/4 of a teaspoon of gelatine (use 1 tsp if you prefer a firmer jelly, I like mine relatively runny, so that you can't actually tell it's jelly). Add the gelatine water to the passionfruit pulp and mix well to combine. You should have 1 cup altogether, if not, you may need to add a little water to make it up to a cup. Finally add a couple of drops of yellow food colouring to make it look really 'passionfruity'. Bring to room temperature before gently pouring over the top of the cheesecake. 

Cover and chill for at least four hours before serving. 


*The separating the passionfruit step can be left out if you're in a rush (or just feeling a bit lazy!), however I find that it helps to give the cream cheese a real passionfruit flavour. 

**The jelly on the top is a crucial step in making this seem like an authentic cheesecake. I only used 3/4 of a teaspoon of gelatine though as I didn't want it to fully set.  

Friday, 30 December 2016

Pina Colada Trifle

I like Pina Colada's, and being caught in the rain... then this is the trifle recipe you've been dreaming of. Okay, maybe not the rain part, though there is something ridiculously refreshing about being caught in a summer rain pour on a hot sticky day.  

Needless to say, this trifle is also a refreshing summer (let's be honest - any time of year) dessert. What's not to like about trifle... cake, fruit, custard, booze... all mingled together to create a flavour explosion, and this cocktail inspired version really does take you to the tropics. 

Also, by using coconut cream and coconut milk to make the custard it becomes dairy free - so great for those people who aren't partial to milk and cream. It also means it's a little bit less rich on the stomach, which makes going back for seconds that little bit less guilty. 

NOTE: To make the coconut custard I chilled two cans of coconut cream (full fat = full flavour) and when opened poured the liquid in to make the custard and reserved the thick cream for whipping on the top of the trifle. If you're not a fan of the thick whipped coconut cream topping them don't bother chilling and separating the coconut cream. Just use the lot, and reduce the amount of additional coconut milk by 1 cup.  

Ingredients (Serves approx 12):

  • 6 egg yolks
  • 2 cans of coconut cream - full fat - chilled and separated (see NOTE above)
  • 2 cups of coconut milk - This time I used the Vitasoy Unsweetened COCO-NUT milk, but I also highly recommend the Little Island Coconut Milk.   
  • 1/2 cup caster sugar
  • 1 whole pineapple, peeled, cored, and chopped into bite sized chunks - If not in season you could use 2 tins of pineapple pieces instead. 
  • 2 cups of Golden Circle Pine Coconut Fruit Drink - alternatively pineapple juice can be used, but will be a little sweeter
  • 3/4 cup of Malibu Coconut Rum
  • 1 large pre-made sponge cake - I used one that was approx 30 x 18 x 8cm * Note: Store bought sponge may not be dairy free if this is a requirement. 
First prepare the coconut custard. This can be done a day or two in advance, and needs to be done early so that it has time to cool thoroughly before assembling the trifle. 
In a large saucepan whisk the egg yolks, sugar, coconut liquid from the canned coconut cream and additional coconut milk. Place on a medium-low heat and whisk constantly for about 10 minutes till custard begins to thicken. The time will vary depending on your stove top, but be sure to whisk or stir so that it does not stick to the bottom. Once it begins to thicken remove from the heat. You can aid the cooling by placing the whole saucepan into a sink filled with cold water so that the water comes midway up the side of the saucepan. Otherwise leave to cool to room temperature before transferring to the fridge to cool further. 

Prepare the pineapple by peeling, coring, and chopping into bite-sized chunks.
Prepare the remaining chilled coconut cream from the cans by whisking till smooth. I sweetened and thinned mine a little by adding a splash of the Pine Coconut juice till it was the desired consistency. 
Prepare the liquid by combining the Pine Coconut Fruit Drink and the Malibu Coconut Rum in a jug. 

To assemble the trifle place a layer of sponge cake into the base of a large glass trifle bowl. I broke the sponge into pieces to make it fit snugly into the bowl. Pour 1/3 of the liquid mixture over the sponge then top with half of the chopped pineapple chunks. Next pour over 1/3 of the custard. Repeat, layering sponge, juice, pineapple, custard, sponge, juice, custard and finally top with the coconut cream. 

I used two spoons to shape the coconut cream into quenelles to decorate the top, then finished it off with a scatter of finely chopped leftover pineapple and sprig of mint. Alternatively you can as I mentioned above thin your coconut cream with a little juice so it's more spreadable to cover the top completely.  


Saturday, 16 July 2016

White Chocolate and Boysenberry Tart

Here's another recipe to add to my growing tart collection. I find these to make the most satisfying desserts, which are also rather impressive for guests. Plus I find them a lot easier to make than cakes. 

Pastry becomes really easy to make once you've got the basics covered, and the use of a food processor here cuts back on the elbow grease required too. Once you have a good pastry recipe, like this one, it's all about the fillings. This is the part I love as I get to be really creative. Either with the latest crave, or simply using up fruit or chocolate in the fridge. 

Here I've used frozen boysenberries, but you could easily swap for raspberries, which are traditionally paired with both white chocolate and cream cheese. Personally, I like the depth of colour that you get with boysenberries, plus as a child, boysenberry jam was my favourite. Mixing the melted white chocolate with the cream cheese adds a subtle tanginess to the white chocolate, which can be overwhelmingly sweet at times. 


Ingredients (serves 8-12) 
Pastry:
  • 1 3/4 cups of plain flour
  • 1/4 cup of icing sugar 
  • 180 grams cold butter, diced
  • 1 egg yolk (reserve white for brushing) 
  • 3 tbsp chilled water
  • greaseproof paper
  • baking beads or rice 
Filling: 
  • 175 grams Whittaker's 23% White Chocolate - you can use another brand of white chocolate, but let's face it, Whittaker's is best. 
  • 175 grams cream cheese 
  • 3 tbsp icing sugar 
  • 1 tbsp lemon juice
  • 2/3 cup defrosted boysenberries, well drained
Step 1: Make Pastry
Sieve flour and icing sugar together. Put into your food processor with the diced butter and pulse for a few minutes till all of the butter is mixed in and it becomes a breadcrumb texture. 
Next add the egg yolk and chilled water. Pulse again. When it begins to come together, tip out onto a lightly floured board and lightly knead until you have a smooth dough. 
Flatten into a 15cm disc. Cover in cling film and refrigerate for at least 30 minutes. Pastry is much easier to work with when it is cold. 


Step 2: Bake Pastry 
Preheat oven to 180 degrees celcius. Grease a 30cm loose-based fluted tart tin with butter. 
Remove pastry from the fridge and roll out on a piece of greaseproof paper large enough to fit the tart tin. 
Gently lay the pastry over the tin and press into the edges. Use the rolling pin to roll across the top of the tin to trim off any excess pastry. 
Place the greaseproof paper over the pastry and fill the tin with baking beads or uncooked rice (less than a kilo of rice will fill it - reserve the rice afterwards for using again the next time you bake pastry). This holds the pastry in place and stops it both puffing up and from sinking down the sides. 
Chill again for 10 minutes. 
Place in the hot oven and bake for 15 minutes. 
Remove tart from oven and take off the baking paper and rice. Brush with reserved egg white, before returning to the oven for another 15 minutes to finish cooking through. 

Remove from the oven and leave to cool. If pastry has puffed up, then simply gently press it back down while it is still hot. 

Step 3: Prepare the filling
Make a double boiler by putting 1 or 2 cups of water into a small saucepan. Cover the top of the saucepan with a bowl so that no steam can escape (the water should not be touching the bottom of the bowl). 
Bring to the boil. Break the chocolate into the bowl and stir, till melted, then remove from the heat. Allow to cool slightly before adding the remaining ingredients. 

In another bowl, beat the cream cheese with lemon juice and icing sugar till softened and smooth. Stir in the defrosted and drained boysenberries. Finally combine the cream cheese mixture with the melted chocolate. Stir 

Carefully spoon the filling into the tart shell and spread evenly. Chill for 2 - 3 hours before serving. Garnish with extra crushed white chocolate or fresh berries if desired. 


Thursday, 24 March 2016

Easy Apple Strudel

Apple Studel is a traditional Viennese pastry and is very popular throughout Europe. Traditionally made with a puff pastry, this version is a little on the lighter side, instead using filo pastry. 
You can stew your own fruit, however I find tinned apples to be just as effective and a lot easier. 
If you do stew your own fruit, be sure not to overcook them for this recipe. You want them to hold their shape and not become mush. 
Filo is very easy to prepare, and if using tinned fruit you just need to assemble and bake for 20 minutes before cutting into the crunchy crispy pastry shell. 

Ingredients (Serves 4 - 6): 
  • 8 sheets of filo pastry 
  • 50 grams butter, melted 
  • 1 can of apple slices, drained (or 1 1/2 cups of stewed apple) 
  • 2 tsp cinnamon
  • 2 tbsp icing sugar, to dust
  • vanilla ice-cream, whipped cream, or thick yogurt to serve
Preheat oven to 200 degrees celsius. 
Lay 1 sheet of pastry on a greased baking tray, brush lightly with butter. Repeat with three more sheets, and then dust the pastry with 1 tsp of cinnamon. Layer and butter the remaining four pastry sheets. 
Arrange the apple slices across the middle of the pastry, leaving a few centimetres at each end bare. Dust with another tsp of cinnamon. 
Fold the ends up of the pastry then fold the sides over. Cut diagonal gashes into the pastry to allow steam to escape, and to make for easier slicing when baked. 
Bake for 20 - 25 minutes till the pastry is golden. 
Remove from the oven and allow to cool for 5 minutes. 
Dust with icing sugar, slice, and serve with ice-cream, whipped cream or yogurt. 

Strudel with Maple Walnut Ice Cream

Friday, 26 February 2016

Fill the tins with Simon and Alison Holst

Last year I gave up junk food. Yes. Truely. 
However, I should really define what I mean by 'junk food'. 
To me junk food is all that processed packaged, often individual serving size wrapped junk. The stuff where you read the ingredients and don't know what half of it is or what the numbers mean, yes, that JUNK. Emulsifiers, acidity regulators, 'natural' flavour (what does that even mean?!?), humectant, stabiliser 223, colour 110... yes, it's in some of our favourite supermarket aisle treats. Don't get me wrong I'm no saint, the convenience of muesli bars and packeted treats are pretty neat... 
... However home baked treats are hard to beat. Home baked goodness, where you know exactly what went into them. Where they are full of actual whole ingredients, sugar, butter, flour. Where you don't add numbers, chemicals, stabilisers, or anything from the world of food-science flavouring. Where you can eat real, home-made food, that all have that secret ingredient of love and effort. Yes, you can taste it, and yes, it is good. 

Sunday baking has become a bit of a ritual lately, and Simon and Alison Holst's The Complete Home Baking Collection is a great resource for keeping those tins full. 

It has all the classic treats that Grandma used to make, plus some awesome twists, plus there are whole chapters dedicated to baking fresh bread, festive treats, and gluten free baking. 

Gingernuts were the first thing I saw when I first opened this book, late one weeknight eve. The drive to make them was overwhelming, so I whipped up a batch right there and then (that's how easy they were) and took them in for staff morning tea the next day. Check the recipe below. 

Another time saver recipe I whipped up this weekend was the Mix-in-a-minute Dark Chocolate Cake, which I filled with raspberries, whipped cream, and smothered in a dark chocolate ganache. Literally mixed in a minute, thanks to the food processor method. 

This is also great way to get kids into the kitchen, building their awareness of how food is produced and helping fill their own lunch boxes. 

But what about the sugar, the fat, the healthiness you ask? What about it?? My grandmother had a great saying, "everything in moderation, including moderation itself" so go on, make that cake, and eat it too. 


Mix-in-a-minute Dark Chocolate Cake (pp.48)
Ingredients (makes a 30 x 20cm cake):

  • 1 1/2 cups sugar
  • 3/4 cup cocoa
  • 1 tsp salt
  • 1 1/2 tsp baking soda
  • 1/4 cup + 2 tbsp canola or other oil
  • 1 1/2 cups water 
  • 2 large eggs
  • 1 1/2 tsp vanilla essence 
  • 2 cups of plain flour
Method

  1. Preheat the oven to 180 (170 fanbake), with the baking rack just below the middle. Line a 30 x 20cm baking pan or small roasting pan with baking paper and coat with non-stick spray. I used a 22cm round cake pan, so it took 50 minutes to bake in total. 
  2. Put sugar, cocoa, salt and baking soda in a food processor, and pulse to mix. Add oil, water, eggs and vanilla essence to the dry mixture and process for about 20 seconds to combine well. Add flour and pulse briefly about 5 times again until smooth. Pour the fairly thin mixture into the prepared baking pan. 
  3. Bake for about 25 minutes, until a skewer inserted into the centre of the cake comes out clean. Cook cake in pan on a rack, then turn out or cut straight from the pan. 
  4. Ice as desired (there's a dozen icing recipes to choose from in the book) or top pieces with whipped cream and fruit or berries. 

Gingernuts 
Ingredients (for 80 small biscuits):

  • 100g butter
  • 1 rounded household tbsp golden syrup
  • 1 cup sugar
  • 1 - 2 tsp ground ginger
  • 1 tsp vanilla essence
  • 1 large egg
  • 1 3/4 cups plain flour
  • 1 tsp baking soda
Method
  1. Preheat the oven to 180 (170 fanbake). Line baking trays with baking paper. 
  2. Melt the butter in a medium-sized pot, or microwave safe bowl. Remove from heat when melted. Dip an ordinary tablespoon into hot water, then measure the syrup with it. Add the syrup, sugar, ginger (use more for a stronger flavour) and vanilla essence. Add the egg, then mix well with a stirrer or wooden spoon. 
  3. Sift in the flour and baking soda. then mix everything together again. 
  4. Stand pot or bowl in cold water to cool the biscuit mixture so it is firmer. With wet hands, roll teaspoonfuls of biscuit mixture into small balls. Put these on the prepared baking trays, leaving room to spread. Bake one tray at a time, for about 10 minutes, until golden brown. While biscuits are still warm, lift them onto a cooling rack. When cold, store in an airtight container. 
Note: if biscuits don't spread, you have used too much flour. If they spread too far, you have not used enough. 


Thursday, 14 January 2016

Salted Caramel Tart


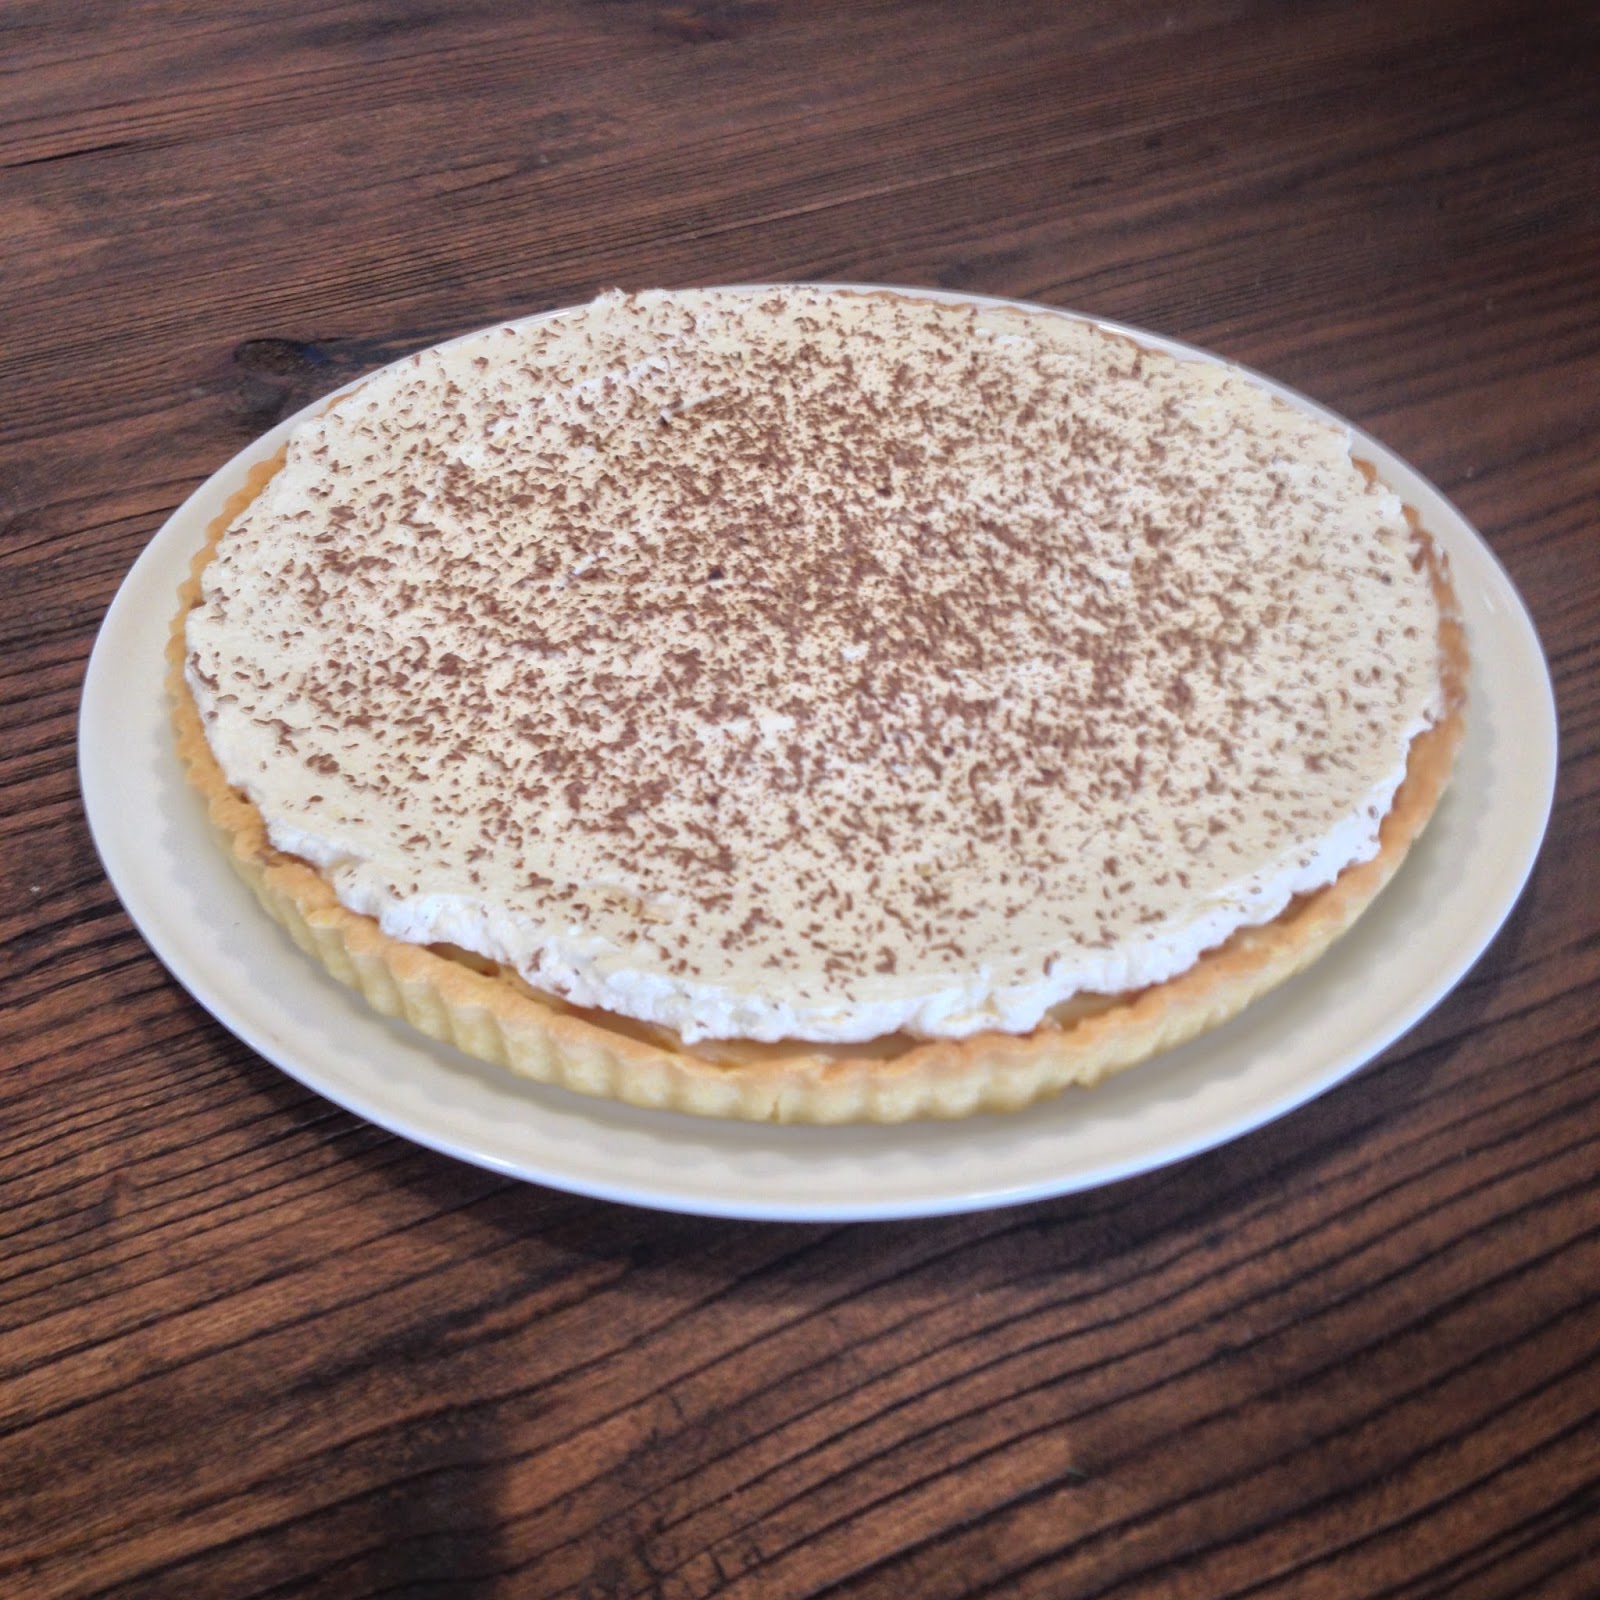
Salted caramel tart with bittersweet chocolate ganache, trust me it tastes about as decadent and luxurious as it sounds. crunchy crumbly chocolate pastry shell, encasing a velvet smooth rich caramel levelled perfectly with fleur de sel (or sea salt, harvested from France), and finished with a blanket of bittersweet chocolate ganache.  

Sounds technical doesn't it? And it is in some respects, but also very very achievable, especially if you've already mastered the art of pastry making in my other tart recipes. Read tips before following the recipe at the bottom of this blogpost. 


PASTRY 

Pastry can be made by hand, rubbing the butter and flour together to form a breadcrumb-like texture, before gently working in the egg and water. Or by simply popping the butter and flour into a food processor, mixing briefly, then using the 'pulse' feature to add the egg yolk and liquids. By using the latter method the pastry only needs a minute or so of light kneading, before wrapping and chilling in the fridge. 

Pastry must always be chilled before rolling. This makes it more likely to stick to itself, and not your bench or rolling pin. Also, just as you dust the bench with flour, do the same to your rolling pin. And if you don't have a rolling pin - a wine bottle will suffice. When rolling be sure to rotate the dough frequently, adding a dust of flour as necessary, this makes sure that it is rolling evenly, and not sticking to the bench. 

Once you've rolled the pastry to the desired thickness and size gently fold it over the pin to help you transfer it to the dish. Then once it is pressed into the dish, simply roll the pin over the top of the tart or pie dish to cut the edges evenly. Baking Blind is a technique using baking beads or uncooked rice which holds the pastry in place while it begins to bake, without it the butter in the pastry can cause it to ooze down the sides of your tin - not so pretty!

CARAMEL 

This was actually my first time making authentic caramel. Usually I do the 'cheat' version of sweetened condensed milk with butter and golden syrup. Today I made the real deal, and trust me the flavour result is well worth the effort. Before heating the sugar I brought the cream, butter and salt to the boil (obviously omit the salt if you want plain caramel), then removed it from the heat to set aside. 

Next, I mixed the water and sugar over a high heat till dissolved then left, without stirring for 8 - 15 minutes (depending on the heat of your element). Here it bubbles up, and will eventually turn a deep golden colour, that's when it is ready. At this point, remove it from the heat, and carefully, slowly add the melted butter and cream mixture while whisking. It will create quite the reaction and bubble up, but persevere, the result will be silky smooth. 

I like to pour the caramel into the tart case while still warm, otherwise you risk it getting to firm to easily work with. 

CHOCOLATE

Melting chocolate is easy right? Well, not always, and is very sensitive to high heat, over heat it, and it becomes grainy and unpleasant. The easiest way I find to melt chocolate is to keep an eye on it, in a double boiler. A metal or glass bowl, rested upon a small saucepan of simmering water, making sure that the water does not touch the bottom of the bowl. 

I put the cream for the ganache into the bowl, and when it begins to warm, add the cubes of chocolate. I stir this for a minute or two, then turn the element off and leave it for a few more minutes. Now whisk or stir well, and the chocolate will continue to melt with the heat of the cream. Eventually becoming silky smooth. Again work with it while it's still warm (not hot as it may melt the caramel). 

Ingredients (serves 16): 

Pastry 

  • 1 1/2 cups of plain flour
  • 1/4 cup of cocoa
  • 1/4 cup of icing sugar 
  • 180 grams cold butter, diced
  • 1 egg yolk
  • 3 tbsp chilled water
Caramel 
  • 3/4 cup of cream 
  • 90 grams of butter
  • 300 grams of white sugar
  • 1/2 cup of water
  • 1/2-1 tsp fleur de sel, sea salt
Chocolate Ganache 
  • 1/2 cup of cream
  • 150 grams Whittaker's Dark Ghana 72% Chocolate
Method: 

Make the pastry: 
Put flour, cocoa,  and icing sugar into the blender, pulse a couple times, to 'sieve' and combine. 
Add diced butter, pulse till it resembles breadcrumbs. 
Add egg yolk, and 1 tbsp water, pulse. Continue adding two more spoonfuls of water until it starts to come together into a ball (You may only need two spoonfuls depending on the size of your egg yolk). 

Tip pastry onto a floured board and gently knead for a couple of minutes so that it feels smooth. Wrap in cling film and refrigerate for 30 minutes. 

Preheat your oven to 180 degrees celsius and grease a 30 cm fluted tart tin, or 8 mini fluted tart tins. Remove pastry bake to the floured board, or a piece of greaseproof baking paper. Roll the dough out to form a circle slightly larger than your tin, about 5 mm thick. Use the pin to transfer the dough to your greased tin, press gently and roll over the top to cut the excess from the edges. 

Cover the pastry with a piece of greaseproof baking paper and fill with baking beads or uncooked rice. Bake for 15 minutes. Remove the paper and baking beads/rice and cook for a further 15 minutes (10 for mini tarts). 
The pastry should be pulling away from the sides of the tin. Remove from the oven and cool in the tin while you make the caramel. 

Make the caramel:  
In a small saucepan, measure cream, salt and butter. Heat till nearly boiling, and butter is completely melted. Set aside to cool slightly. 

In another heavy based saucepan, measure water and sugar. Bring to the boil on a high heat, stirring until the sugar is completely melted. Continue boiling without stirring for approximately 10 minutes till it turns a golden caramel colour, it will also start to smell delicious. 

Once the colour has changed, remove from the heat and carefully (it will boil up like a crazed science experiment - fun for the kids to watch), whisk while slowly adding the melted cream and butter. Keep stirring till you get the silky smooth caramel. Taste to check the salt, you may wish to add more, you want the salt to balance with the sweet of the caramel so that you taste both, but neither overpowers the other. 

Let the caramel cool a bit, so it's still warm and flowing, but not hot. Pour it into the tart shell and tilt to spread evenly. Chill in the refrigerator to set for at least two hours. 

Make the chocolate ganache: 
Create a double boiler (see above), and pour the cream into the bowl. Allow to heat then add cubed chocolate. When chocolate begins to melt, turn the heat off, and leave the bowl sitting over the hot water for a few minutes. After waiting stir/whisk till the chocolate is completely melted and smooth. Remove from the heat, and just like the caramel, allow to cool a little. Gently pour over the caramel, and return to the fridge for at least 30 minutes to cool completely. 

To serve, use a hot knife (rest it in a mug of boiling water) to slice the tart into pieces. 


If you liked this recipe, you may also like: Chocolate peppermint tart, Banoffee TartRhubarb Frangipane Tart, Pina Colada Tart


Rhubarb Frangipane Tart
Pina Colada Tart


Banoffee Tart
Chocolate Peppermint Tart

Sunday, 10 January 2016

Walnut Chocolate Brownies

The new year is often a time for resolutions and healthy feel good goals, which are usually too extreme to maintain, like no junk food - yeah right. As far as I'm concerned there is no good or bad food. Sure some things we should eat more of than others, but restricting something is only going to make you want it more!! 

I don't think I know anyone who doesn't like chocolate brownies  - except maybe me. However for some reason I had a craving, and the only way to satisfy a craving is to have the thing which one craves, these brownies are rich and chocolates, the addition of walnuts adds a delightful crunchy texture and the subtle aroma of olive oil cuts through the sweetness. Making these chewy chocolates morsels quite devine. They're also rediculously easy to prepare.

Ingredients (makes 12 - 16):

  • 220 grams dark chocolate
  • 170 grams walnut pieces
  • 1/2 cup olive oil
  • 3 eggs
  • 2/3 cup brown sugar
  • 1 tsp vanilla essence 
  • 1/2 cup flour
  • 1/2 cup cocoa
  • 1/2 tsp baking powder 
Method

Grease a 20cm square baking dish and line with baking paper. Preheat oven to 170 degrees Celsius. 

Over a double boiler, gently melt the chocolate. Set aside to cool slightly. 

Use an electric beater to beat eggs with sugar and oil. Slowly poor in the melted chocolate while still beating. Doing this slowly makes sure that you don't scramble the eggs in the residual heat of the chocolate. 

Next sift the dry ingredients, flour, cocoa, and baking powder over the chocolate mix. Use a large metal spoon to gently fold together till combined. Finally fold in the walnuts. 

Spread into the prepared baking dish and bake for 35 minutes. The top will start to crack a little. 

Cool in the tin, before removing and gently peeling off the baking paper. Cut and serve with cream or ice cream. 


Tuesday, 24 November 2015

Banoffee Tart

Banana and toffee, or more commonly known banoffee pie, has been a favourite of mine since the days of going to Lonestar to order their wicked banoffee. I discovered their caramel was made by boiling tins of sweetened condensed milk for three hours, then simply pouring it in. 
This version also uses sweetened condensed milk, but mixed in a saucepan with butter and golden syrup. Just make sure to keep stirring and watch the pot. Burnt or split caramel is not an ideal situation. Other than a bit of TLC this tart is straight-forward, but as always, sure to impress a crowd. 


Ingredients (serves 8-12) 
Pastry:
  • 1 3/4 cups of plain flour
  • 1/4 cup of icing sugar 
  • 180 grams cold butter, diced
  • 1 egg yolk (reserve white for brushing) 
  • 3 tbsp chilled water
  • greaseproof paper
  • baking beads or rice 

Filling:
  • 2 bananas 
  • juice of 1 lemon
  • 400g tin of sweetened condensed milk 
  • 50 grams butter
  • 2 tbsp golden syrup
Topping:
  •  200 mL cream, whipped
  • 100g mascarpone 
Step 1: Make Pastry
Sieve flour and icing sugar together. Put into your food processor with the diced butter and pulse for a few minutes till all of the butter is mixed in and it becomes a breadcrumb texture. 
Next add the egg yolk and chilled water. Pulse again. When it begins to come together, tip out onto a lightly floured board and lightly knead until you have a smooth dough. 
Flatten into a 15cm disc. Cover in cling film and refrigerate for at least 30 minutes. Pastry is much easier to work with when it is cold. 


Step 2: Bake Pastry 
Preheat oven to 180 degrees celcius. Grease a 30cm loose-based fluted tart tin with butter. 
Remove pastry from the fridge and roll out on a piece of greaseproof paper large enough to fit the tart tin. 
Gently lay the pastry over the tin and press into the edges. Use the rolling pin to roll across the top of the tin to cut off any excess pastry. 
Place the greaseproof paper over the pastry and fill the tin with baking beads or uncooked rice (less than a kilo of rice will fill it - reserve the rice afterwards for using again the next time you bake pastry). This holds the pastry in place and stops it both puffing up and from sinking down the sides. 
Chill again for 10 minutes. 
Place in the hot oven and bake for 15 minutes. 
Remove tart from oven and take off the baking paper and rice. Return to the oven for another 15 minutes to finish cooking through. 

Remove from the oven and leave to cool. 

Step 3: Make Caramel
Slice bananas on a diagonal and place in a bowl with lemon juice. Toss gently to cover. 
Set aside while you prepare the caramel. 
To make the caramel, place sweetened condensed milk, butter and golden syrup into a heavy saucepan on a low heat. Stir constantly for 10 - 15 minutes till the caramel starts thicken and the colour darkens slightly, you'll also notice a delicious caramel aroma. 
Work quickly to fill your pastry base. 

Step 4: Fill the Base
Spoon a small amount of caramel into the tart base, and spread to cover the base with the back of a spoon. 
Drain bananas and arrange in a single layer over the caramel base. Pour remaining caramel and gently spread to cover evenly. Allow to cool completely before putting on the cream topping. 

Lightly whip the cream to form soft peaks. Beat, then fold in the mascarpone. Then dollop the cream mixture over the cooled caramel and spread evenly. Finally grate a little chocolate over the top. Chill, and remove from the fridge about 20 minutes before devouring. 

Use a sharp knife to cut into 8 or 12 pieces.