Showing posts with label ginger. Show all posts

Sunday, 4 December 2016

Chicken and Olive Tagine

I'm a big fan of aromatic foods, particularly Moroccan dishes. Technically a tagine is a curry, but more aromatic (cinnamon, cloves, ginger) than heat like you would get from an Indian curry. In saying that, this number does have a little chilli which can be increased or decreased to taste. If you don't have a tagine to cook this in, don't worry. A large saucepan with a lid will do the same job. Just when you pop the lid on, be sure to tilt it a little so a small amount of steam can escape, but effectively it keeps most of the steam circling inside. 

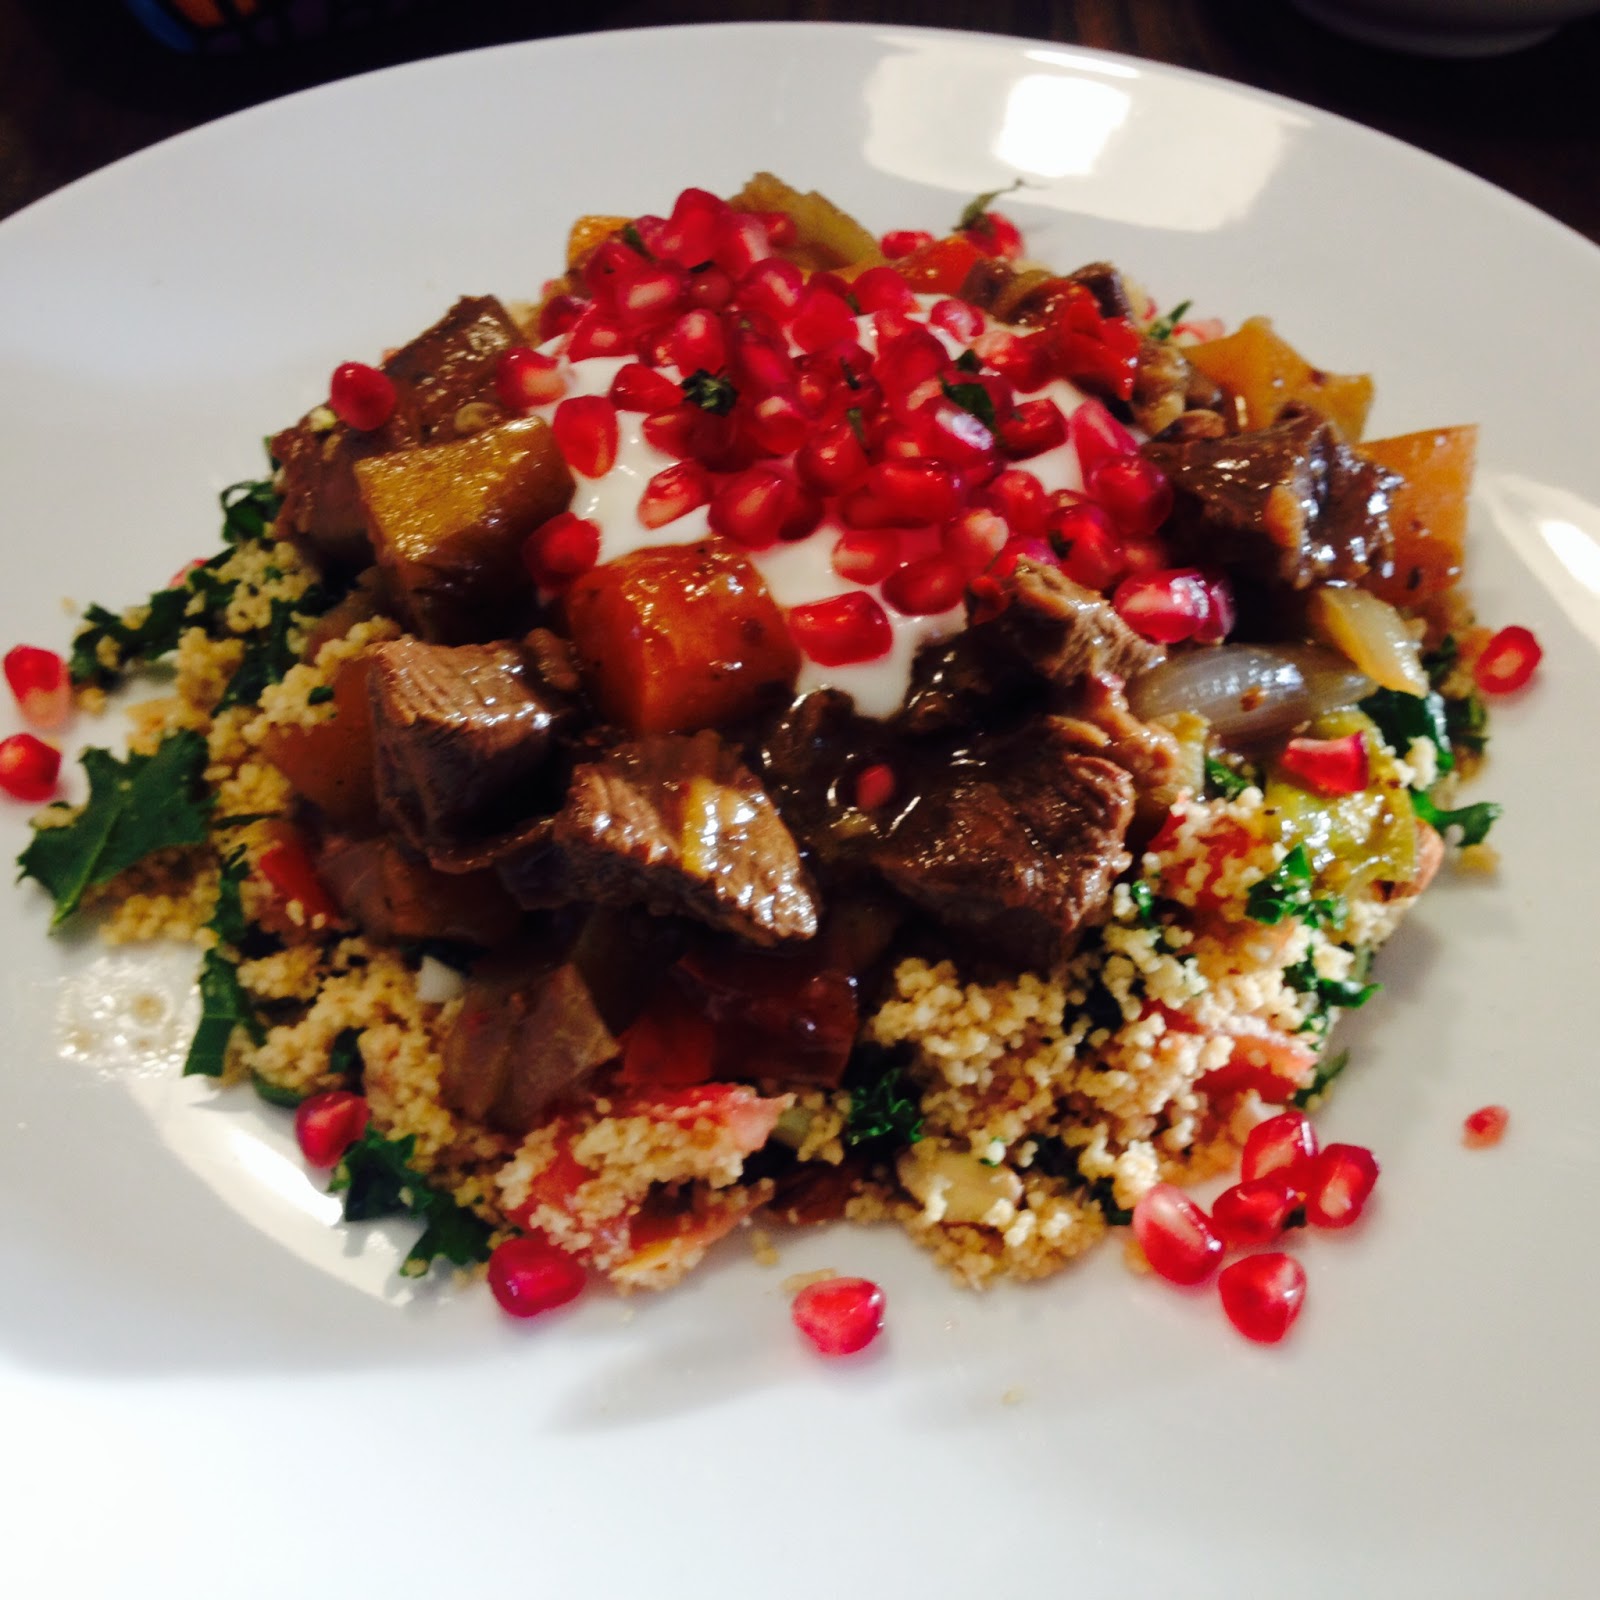
I serve this with a simple couscous and some harissa spiced yogurt, but it would be equally nice served with rice, roasted or mashed potatoes. You could also serve it with plain yogurt, or coconut yogurt, or simply eat it as is. I just love the sweet and spicy kick that you get from adding the Julie Le Clerc Spicy Harissa paste to the yogurt. 

Ingredients (serves 4): 

  • 1 tsp cumin seeds
  • 1/2 tsp cloves
  • 1 tsp peppercorns
  • 1 tsp smoked paprika
  • 1 tsp crushed ginger
  • 4 cloves crushed garlic
  • 1 tsp chilli flakes
  • 2 bay leaves
  • 1 tsp salt
  • 3 tbsp olive oil
  • 400 grams of free range skinless chicken thighs
  • 1 onion, thinly sliced
  • 2 carrots, sliced on a diagonal
  • 1/2 cup of green or black olives - I've used pitted black olives this time
  • rind of 1 lemon
  • 1 cup of chicken stock
Couscous
  • 300 grams couscous
  • 450 mls boiling water
  • 3 tbsp olive oil
  • juice of 1 lemon
  • 1/4 cup of finely chopped fresh parsley - mint or coriander would work if you don't have parsley
  • 1/3 cup of dried dates or apricots, finely chopped
To Serve
  • 1/2 cup of plain unsweetened yogurt 
  • 1-2 tbsp of Julie Le Clerc Harissa paste
  • Steamed green beans - or other greens - to serve
In a dry frying pan, heat the cumin seeds, cloves and peppercorns till toasted and aromatic. Remove from the pan and crush with a mortar and pestle. Place in a non-metallic bowl with the remaining spices: paprika, ginger, garlic, chilli, bay leaves, salt and olive oil, mix well, then add the chicken thighs. Stir to coat and set aside for at least 30 minutes, or alternatively overnight. 

Heat the base of the tagine, or a large saucepan and add the chicken pieces, browning each side for a couple of minutes. Add the onions and carrots and stir so the onion begins to soften. Finally add the chicken stock, lemon rind and olives. Use the addition of the liquid to lift any flavoursome sticky bits from the bottom of the pan. Place the lid on top, and simmer on a low heat for 20 - 35 minutes till the chicken is cooked through - cooking time will vary depending on the size of your chicken pieces.

Meanwhile prepare the couscous. Mix the boiling water and olive oil with the couscous. Cover and set aside for 5 minutes to absorb. Add the lemon juice, parsley and dried fruit. Stir to combine. 

Mix the yogurt with the harissa paste and serve in a small bowl alongside the tagine. 

Once the chicken is cooked, remove to a serving plate, spooning the onions, olives and juices over the top of the pieces of chicken. Serve with couscous, spiced yogurt and green beans.


If you liked this recipe you could also try my Lamb Tagine with Cranberry and Almond Couscous

Saturday, 8 October 2016

Finger Licking Good: Chinese Style Ribs

Did someone say ribs? YES please! I mean seriously, who doesn't like tucking into a plate full of them - It's so cathartic. And to be honest, I've eaten tonnes of them, with all sorts of different seasonings, but these are up there with the best. 

The slow cooking is the key: Wrapping them in foil, and cooking for two hours locks in the moisture and flavour, and has the meat falling off the bone. While the glaze, sticky sweet and salty, leaves you begging for more! 

The recipe here is for 1.5kg worth and though you could easily half or double the recipe, this is a good amount of ribs for one sitting (perhaps only four servings if you really want to tuck in!). 

Though they take a long time in the oven, the actual work involved in making these is nothing, the biggest challenge being patience! Trust me - it's worth the wait. 

Ingredients (serves 6): 

  • 1.5 kg rack of pork ribs
  • 4 tbsp vegetable oil
  • 4 tbsp Chinese five spice
  • 4 tbsp crushed garlic 
  • 4 tbsp crushed ginger

Glaze

  • 2 tbsp vegetable oil 
  • 4 tbsp crushed garlic 
  • 4 tbsp crushed ginger 
  • 2 tsp Chinese five spice 
  • 6 tbsp soy sauce
  • 4 tbsp Chinese rice wine vinegar 
  • 6 tbsp honey 
  • 2 tsp Sriracha chilli sauce (optional - but highly recommended) 

To Serve

  • Coriander leaves
  • Cooked Rice, or bread rolls
  • Slaw, or steamed greens 

Preheat the oven to 180•C. Line a large roasting dish with two layers of tin foil.*You might need two trays, if so, swap them around in the oven halfway through cooking. 

Rub the ribs with vegetable oil and Chinese five spice so it's well coated. Place flesh side up on the foil, and spread the crushed garlic and ginger over the top. Gently fold the foil around the ribs to seal them. Place in the hot oven for 2 hours. 

Meanwhile, heat the additional 2 tbsp oil in a small saucepan. Over a low heat, cook the garlic and ginger, stirring for a couple of minutes, till aromatic. Add the Chinese five spice, and cook, stirring for another minute. 

Stir in the soy sauce, rice, wine vinegar and honey. Simmer gently for 2 minutes. Remove from the heat and allow to cool for a few minutes before transferring to a blender or food processor. Puree till smooth. 

Return to the pan and bring back to the heat, taste, and add Sriracha sauce to taste. You could also add more soy or honey to taste if you want sweeter or saltier, but I think the ratio is pretty spot on once coating the ribs. 

After 2 hours, remove the ribs from the oven and open the package. Increase the heat to 200•C. Use a basting brush, or spoon, to liberally cover the rack of ribs with the glaze. Return to the oven for 8-10 minutes. 

Brush again with more glaze and return to the oven for another 2 minutes. You can repeat this part of the process as much as you like if you want a thicker richer glaze, but be sure to check it every minute or two. I usually only do this twice, and like to save a little sauce for the side. You can serve the additional glaze in a dipping bowl on the side, or pour it over your rice and steamed greens. 

Serve the ribs as a whole rack, or slice them into individual pieces. Remember to set up a pile of paper towels and maybe a finger bowl of iced water and lemon. 


Sunday, 2 October 2016

Ginger Caramel and Dark Chocolate Tart

It was my brother's birthday and I wanted to make something that I knew he would love! I remember years ago he ate an entire bag (in one sitting) of my dark chocolate coated crystallised ginger pieces... needless to say I figured this would be a winning flavour combination.

Following the same pastry recipe as my other tarts, this one is instead filled with a fudgey layer of ginger spiced caramel, topped with Whittaker's 62% Dark Chocolate ganache and then pieces of crystallised ginger sprinkled on top. The result, pure delightful decadence. Technically it's a cross between ginger crunch and a chocolate caramel slice.

Ingredients (serves 8-12):  
For the Ginger Caramel
  • 3 tbsp ground ginger - don't be shy!
  • 150 grams butter
  • 1 1/4 cups brown sugar
  • 1/2 cup of cream
In a small saucepan melt the sugar, cream, half of the butter and the powdered ginger. Bring to a gentle simmer and keep whisking (5-10 minutes) till thickened into a caramel. I test the thickness by dropping a little bit onto a cold saucer, and tilting it to see how thick it is as it cools. 

Once thick, remove from the heat and whisk in the remaining butter to form a smooth glossy caramel. Pour over the cooked pastry shell while still warm. 


For the Chocolate Ganache
  • 180 grams of Whittaker's 62% Dark Ghana Chocolate, chopped
  • 125 ml cream
  • 1/2 cup crystallised ginger, roughly chopped
In a small saucepan, gently heat the cream till it is just boiling. Remove from the heat and add the chopped dark chocolate, whisk until all of the chocolate is melted in, thick and glossy. 

Allow to cool a little if necessary before spreading evenly over the cooled ginger caramel layer. Sprinkle with the chopped ginger and gently press this into the chocolate layer before it sets. 

Serve with softly whipped unsweetened cream. 


Friday, 11 March 2016

Pear and Ginger Frangipane Tart

This is the latest seasonal addition to my tart collection. Pear and Ginger. Surround by the luscious frangipane filling and encased in a crunchy, yet buttery tart shell this makes the perfect dessert or afternoon tea accompaniment. 
The recipe follows as per my Rhubarb Frangipane Tart, except for the poaching of the pears. 


Ingredients


  • 200g plain flour
  • 1/4 tsp salt
  • 100g butter, cold and cubed 
  • 1 egg yolk
  • 2 tablespoons of iced water
  • 2 pears, quartered, core removed
  • 2 cups of sweet wine - I used a moscato, alternatively you could use a pear or apple juice. 
  • 2 tbsp of sliced fresh ginger 
  • 4 cardamom pods, bruised
  • 125g butter, room temp.
  • 125g caster sugar
  • 2 eggs
  • 140g ground almonds
  • 45g plain flour 
  • 1 tbsp ground ginger 
  • 50 grams cubed butter, for the top
  • brown sugar, for sprinkling

In a bowl place cubed butter, flour and salt. Rub together using fingers until it resembles breadcrumbs. To speed up the process you can do this in a food processor, which makes it very quick and easy, but less therapeutic. Once rubbed in, add the beaten egg yolk and chilled water, mix to form a firm dough. Cover loosely in glad wrap and chill 30 mins. 

Quarter pears and remove the core. Place in a sauce pan with 2 cups of sweet wine or juice. Add ginger and cardamom. Bring to a gentle boil, and simmer for 10 - 15 minutes, till pears are softened, but not mushy. Remove from the liquid and allow to cool before slicing thinly. 


Grease a 22cm tart tin, and preheat oven to 180 degrees. 

Remove pastry from the fridge and roll out on a lightly floured surface. Press gently into tin and trim edges - rolling the pin across the top gives you a smooth finish. 

Next cream the 125g of room temperature butter and caster sugar till light and fluffy. Add the eggs one at a time, then flour, ginger, almonds, and remaining vanilla essence. Spoon this filling into the pastry. 

Carefully arrange the sliced quarters of pear onto the frangipane filling and press down gently. Drop the cubes of butter over the top and sprinkle a few tablespoons of brown sugar over. 

Bake for 50 minutes. You want the top to be slightly browned, and the pastry to be coming away from the edges. 


Serve with greek yogurt or vanilla ice cream. 

Thursday, 21 January 2016

Blueberry and Mascarpone Tart

If you've read a few of my recipes, you'd notice I love making tarts. However many of them require a few steps, layers, and wait time. This one however, you can quickly whip up and have it ready to eat without so much waiting around. 

I made the gluten and grain free pastry this time as well. It's also quicker to prepare as there's no chill time, or blind baking involved. 

Blueberries are relatively cheap this time of year, so use fresh, frozen ones will bleed into the cream, and not look as attractive. You could also use raspberries, or strawberries, but I like blueberries. 


Ingredients (Serves 8 - 12):

  • 1 gluten/grain free tart shell or 1 sweet pastry tart shell
  • 500 grams mascarpone
  • 1 tsp vanilla essence
  • 2 tbsp brown sugar
  • 1/2 cup of greek or plain unsweetened yogurt
  • 2 punnets of fresh blueberries, at least 1 cup
  • 1/3 cup coconut flakes, toasted in a dry pan
Method:

In a medium sized bowl, beat the mascarpone with a whisk. 

Add vanilla essence and sugar (make sure there are no lumps in the sugar). 

\Add yogurt, and whisk to combine. 

Spread into the cooled tart shell. 

Arrange the berries randomly over the top. 

Toast coconut in a dry pan on a low heat, careful they can burn quickly. 
Sprinkle over the top. 

Slice and serve. 

Gluten Free Pastry

I've been working on a gluten free, grain free pastry, partly for more variety, and because I actually like the taste. This one, made with almond and coconut flours has a lightly nutty taste and melts in your mouth, just like pastry should. Plus it's good to have a gluten free variety up my sleeve for times where I need it. 

I flavoured this one with ground ginger to compliment the blueberries going in the filling, but you could easily use cinnamon, or cocoa. If using cocoa, use 2 tbsp. 

This version isn't dairy free however, as it uses butter. I'll try using coconut oil, or olive oil next time and see if it is as effective. 

Ingredients: 

  • 1/2 cup coconut flour
  • 1 1/2 cups almond meal or almond flour
  • 4 tbsp brown sugar
  • 100 grams butter, cubed
  • 1 tsp ground ginger or cinnamon, or 2 tbsp cocoa (optional) 
  • pinch of salt

Method (food processor): 
  1. In a food processor place flours, sugar, salt, and spice, blitz for a few seconds to combine. 
  2. Add cubed butter, turn on high and mix for a couple of minutes. 
  3. First it will go like bread crumbs, then it will form into a dough. 
  4. When nearly all combined tip out into a buttered tart or pie dish. 
  5. Press evenly around the tin, getting right to all the edges. 
  6. Bake for 180 degrees for 12 - 16 minutes till a light golden brown colour. 
  7. Cool and fill
  8. Store in the refrigerator once completed 

Method (bowl):
  1. Mix flours, sugar, salt and spice in a bowl. 
  2. Melt the butter and use a knife to mix it though. 
  3. Once a little combined, use clean hands to continue massaging it into the dough. 
  4. When you have a dough, continue from step 4. above. 

Pictured below with Blueberry and Mascarpone filling


Friday, 23 October 2015

Lamb Tagine w Cranberry Almond Couscous

Tagines are an aromatic Moroccan curry, with a sweet spice, rather than heat. 
To get best flavour I like to toast my cumin and coriander seeds on a dry heat and then grind them in a mortar and pestle. Apart from a little bit of preparation, this is ridiculously low maintanance to cook. Just put it in the pot and check on it every now and then. The couscous just hot water, stir and add some chopped vegetables, fruit and nuts. Too easy. 
You can make the couscous in advance and allow to chill in the fridge while you prepare the tagine. If available serve with fresh pomegranate seeds and plain yogurt. 

Cranberry Almond Couscous (serves 4):

  • 400 grams couscous 
  • 2 tbsp olive oil 
  • 1 tsp salt 
  • 70 grams slivered almonds
  • 1/3 cup dried cranberries - or raisins 
  • 3 tbsp fresh mint, finely sliced
  • 1 tomato, diced
  • 1 spring onion, finely sliced
  • 1 cup fresh kale or spinach leaves, finely sliced
  • juice of 1 lemon 

Cook couscous according to packet directions, stir though remaining ingredients, set aside. 


Lamb Tagine (serves 4): 

  • 2 tsp ground cumin
  • 2 tsp ground coriander
  • 2 tsp salt 
  • 1 1/2 tsp ground ginger 
  • 1 tsp chilli flakes
  • 1 tsp white pepper
  • 1 cinnamon stick 
  • 1/2 tsp ground allspice
  • 2 tbsp oil 
  • 2 cloves garlic, crushed 
  • 500 grams diced lamb meat
  • 1 lemon, rind and juice
  • 500 ml vege or beef stock 
  • 2 carrots, sliced
  • 1 large kumara, diced into 2-3cm pieces
  • 1 onion, thickly sliced
  • 2 tbsp flour (to thicken if necessary) 


In a large bowl mix all of the spices, the olive oil, garlic and diced meat. Cover and set aside in the fridge for 3 hours if time allows. 

In a large saucepan, or soup pot, place meat mixture, lemon juice and rind, vegetables and stock. Bring to a low boil, stir, and place the lid on the pot on a tilt, so that some steam can still escape. 


Simmer for 40 minutes, stir, then either remove lid to allow liquid to reduce more or return lid and thicken later with flour. Cook for another 20 - 40 minutes till meat is tender and liquid thickened. If thickening with flour, mix the flour with a few spoonfuls of cold water in a small bowl, pour this paste into the tagging and stir to combine, from here it will thicken quickly so do this shortly before eating. 

Serve couscous with tagine, pomegranate seeds and plain yogurt. 


Sunday, 30 August 2015

Dark Chocolate Ginger and Orange Oaties


This is my twist on a kiwi classic, the ANZAC biscuit. Traditionally made with oats, coconut, and golden syrup, and without eggs so that they would keep for a long time whilst in transit. 
My version however, has a few of my favourite things: Dark Chocolate, Ginger and Orange. 

Delicious little morsels. I used Whittaker's 72% Dark Ghana, because it's the best. Always look for at least 50% cocoa solids in any dark chocolate, and if you can, use Whittaker's.

If you're a big spice fan, feel free to add more ginger, 2 tsp wasn't quite enough kick for me. 


Ingredients (makes 25 - 30 cookies): 
  • 150g butter, melted
  • 2 tbsp orange juice
  • 1/2 cup sugar
  • 1 cup of plain flour
  • 2 tsp ground ginger
  • 1 cup of rolled oats
  • 1 cup of coconut 
  • 2 tbsp orange rind
  • 1/2 cup of quality dark chocolate, chopped
  • 1 tsp baking soda 

Method: 

Preheat oven to 180c and line to baking trays with baking paper. 

Melt butter and mix in orange juice. 

Sift flour and ginger in a large bowl, stir through oats, coconut, orange rind and dark chocolate. 

In a small bowl mix 2 tbsp boiling water, with baking soda and add this to the butter. Stir butter into the dry ingredients. Mix well. Mixture will be a little crumbly. 

With wet hands, roll small handfuls of dough and and place on the tray, leaving room for the cookies to spread. 

Bake 20-25 minutes till golden. Leave on the tray to cool. They will harden as they cool. 

Store in an airtight container up to a week... If they last that long. 


Thursday, 24 April 2014

Ginger Crunchathon

It all started two weeks ago when my Facebook feed started filling with pictures of Chelsea Winter's Oaty Ginger Slice Recipe. So of course, I started craving it. Big time. 
We were on a road trip zigzag-ing from west to east coast beaches over the Easter Holiday's and the hunt began, each cafe/stop we made along the way, I was scouting for the ideal crunch to sample. Many discussions about the desired texture, not too dry, the right ratio of icing to base, varying textures between oaty crunchy bases and gooey  gingery caramely icing, plus I like things with bits, layers, dimensions, contrast. 
Unfortunately none, of the samples along the way sufficed. Too much icing, not enough texture, pasty boring bases.... So, there was only one resort left. Come to the conclusion, that if I am going to be that fussy, I might as well make my own. After trawling several online blogs, forums and recipes I amalgamated my own recipe using what I had in my pantry. Though I admit most of my inspiration came from this fabulous example of Oaty Ginger Crunch. I think the key word here is crunch. Love the texture. Because it's full of oats coconut and a dash of golden syrup, the base resembles an Anzac Biscuit. Yep, a biscuit favourite combined with my favourite slice. Pure Genius. 

So anyway, I got to baking and the result, well, try it for yourself. 

I've used weights as measurements which means that there's no need for using every single measuring cup you own, just pop the bowl on the scales and add each ingredient (though you will then need to add, which on the few hours sleep I've had can be difficult!) 

In the recipe I've put LSA, which is a mix of ground Linseed, Sunflower Seeds and Almonds, however I didn't have quite enough, so I added some whole linseed and sunflowers too, they added a great dimension, so if you have them on hand I recommend adding too. Otherwise just ground linseed, almond or sunflower seeds will add the desired texture and 'nutritional boost'. I use quotation marks because you're kidding yourself if you want to call this nutritious, but every little bit helps right? 

I've topped it with a mixture of chopped roasted almonds, crystallised ginger and Ceres Organics Sweet and Salty Coconut Smiles. The feedback I've had so far on this recipe is that it's pretty darn tasty, or f#^k!ng good, to be precise. Try it for yourself and let me know what you think. 


Ingredients 
Base
150g butter
30g golden syrup
1 Tbsp of ground ginger
125g white sugar
50g LSA mix, (Linseed Sunflower and Almond - however straight ground linseed, or almonds, or sunflower seeds will also work) 
110g rolled oats
70g desiccated coconut
140g self-raising flour


Topping
90g butter
90g golden syrup
3 Tbsp ground ginger
190g icing sugar


Optional toppings:
1/4 cup toasted chopped almonds
2 Tbsp crystallised ginger, finely chopped

Ceres Organics Coconut Smiles 

Method
Preheat oven to 180°C

Line a 20 x 30cm slice tin with greaseproof baking paper. 


In a gently heated suacepan melt butter. Once it begins to melt add golden syrup ginger and sugar.

Stir till it has all melted together. 

Remove from heat and add LSA, oats, coconut and flour, mix till well combined.


Spoon into tin, using the back of the spoon to press it down firmly. 


Bake for 15 mins until golden.

Put aside and leave in the tin to cool. 


The unbaked base - plenty of whole linseed also, great texture

Once cooled prepare the topping. 

Melt butter in saucepan on a gentle heat, again once it starts melting add the golden syrup, powdered ginger and icing sugar. 

Stir over the heat till smooth and topping thickens. 

Pour over the base, I lift and tilt the tin to help spread it around evenly. 

Now sprinkle with the chopped almonds ginger and coconut. Leave to set. 

Once set, you should be able to lift it out with the baking paper straight onto a chopping board. 
Slice into squares, 24 if you make them small or if you want bigger bits, 12 or 15 pieces.